Opsgenie Integration
Opsgenie is an advanced incident response orchestration platform for DevOps and IT Teams. Site24x7 and Opsgenie customers can streamline their monitor alerts and incident resolution processes by taking advantage of Opsgenie’s alert & notification management, on-call scheduling and escalation capabilities. Key functionalities of the integration are:
- A Site24x7 monitor status alert automatically creates an incident ticket in Opsgenie.
- Once the status of the monitor is UP again, the related alert is closed in the Opsgenie portal.
Prerequisites
You need a valid and active account in Opsgenie.
Copy and securely retain the Hook URL provided by Opsgenie. After successful integration, Site24x7 will post status alerts to this Opsgenie Hook URL.
Configuring Opsgenie side of the integration
- Log in to your Opsgenie account.
- In the Quick Start Guide section, click Integrate with Jira and your monitoring tools.
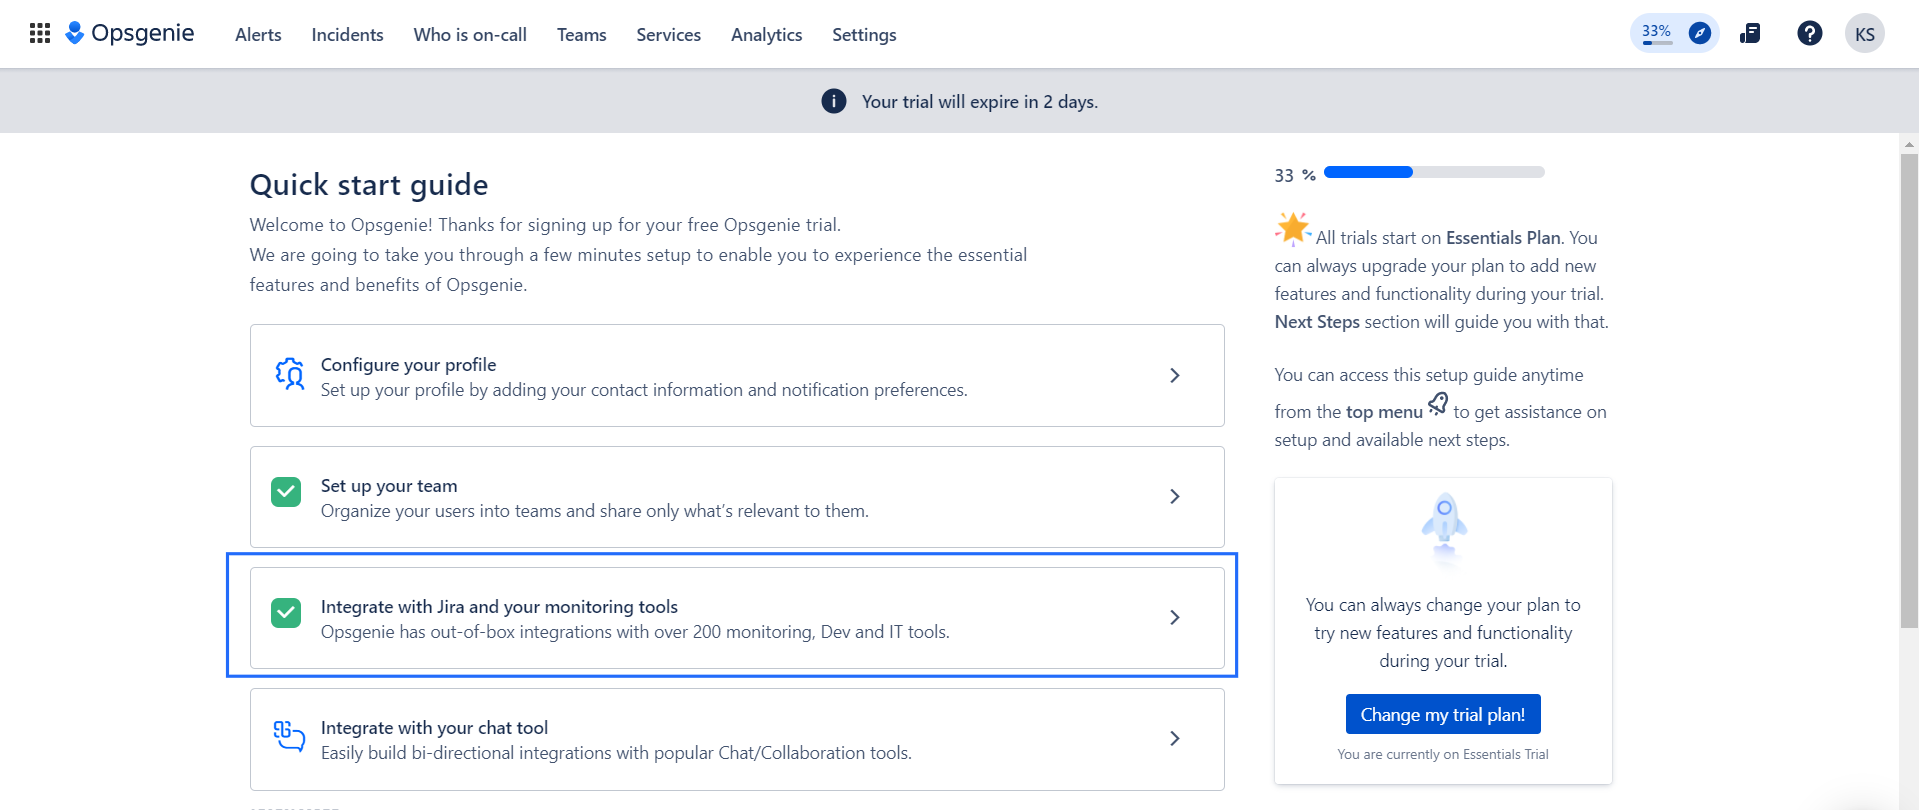
- In the new page that opens, click on the Add Team button.
- In the Add Team pop-up that opens, provide details in the Name, Description, and Add Members fields. Click the Add Team button once done.
NoteSpecify who should be notified for Site24x7 status alerts using the Teams field.
- After adding the team, you'll be redirected to the Integrations page. Click the Add Integrations button and click on Site24x7 from the list of integrations.Then click Add.
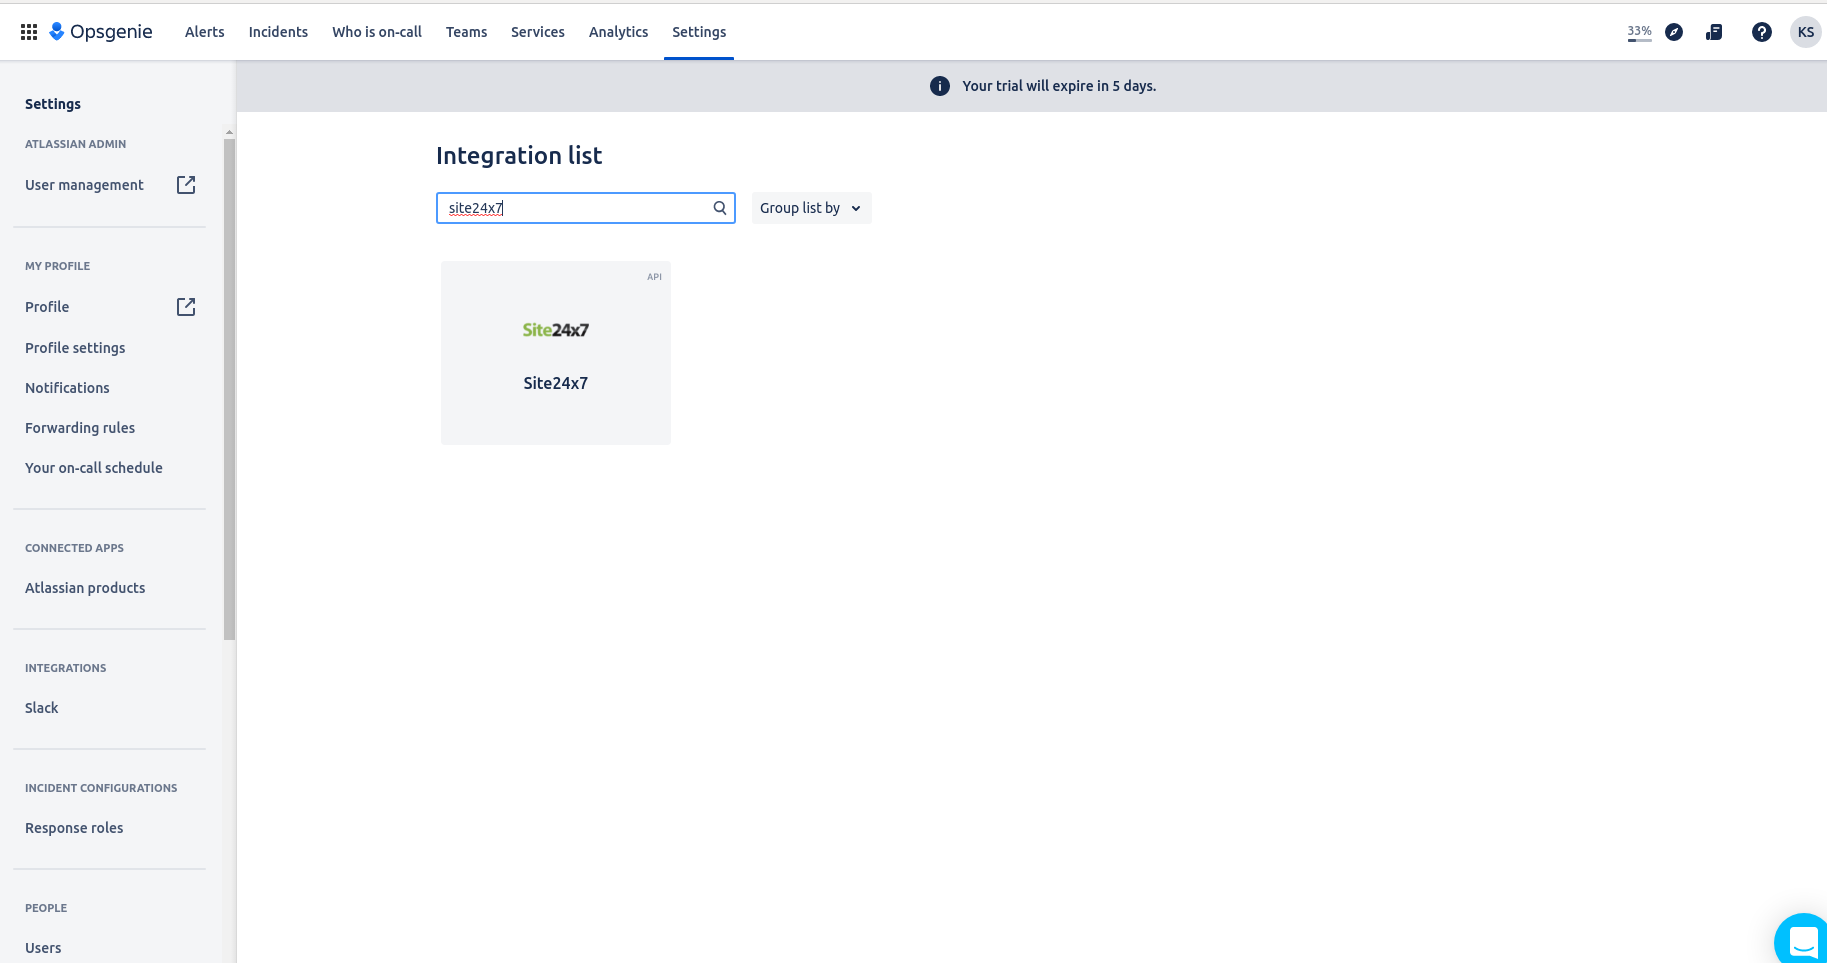
In the Site24x7 Integration page in Opsgenie, copy the Hook URL by clicking on the copy button or by selecting it. Securely retain the Hook URL. This URL must be pasted in the Hook URL field in Site24x7's Integration form.
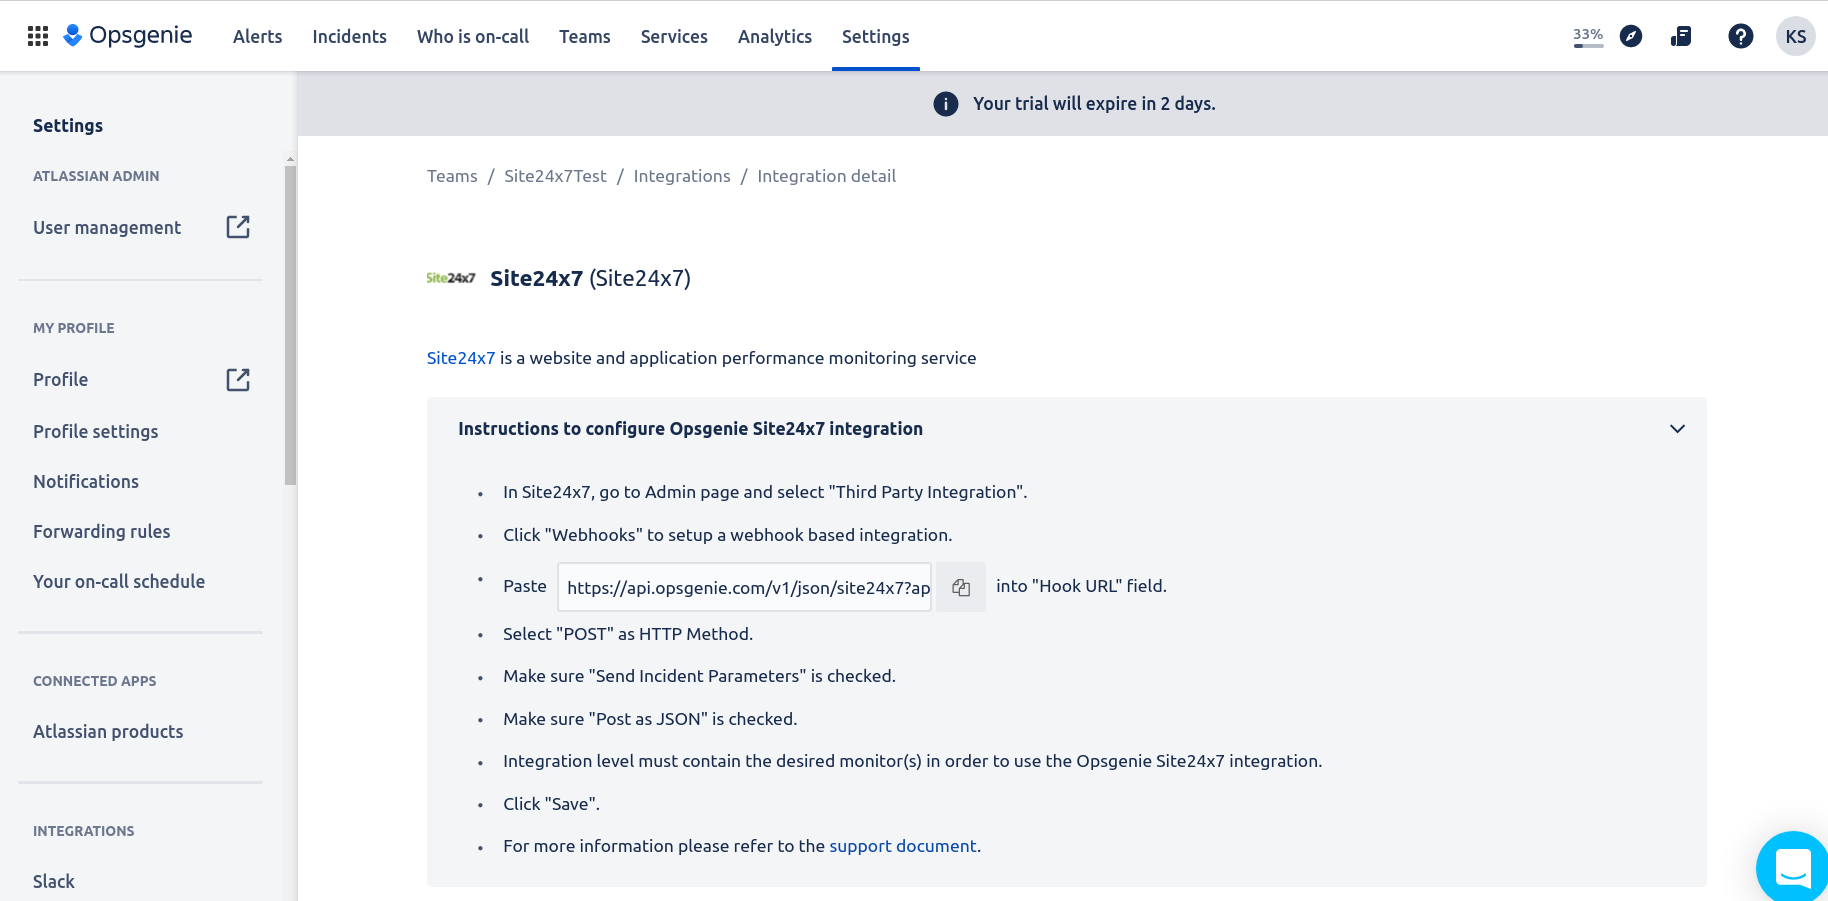
In the Settings section, provide Name, API Key, Suppress Notifications, Tags, and Extra Properties.Using the params under Extra Properties, Opsgenie will parse Site24x7 data to construct rich and informative incident tickets. You can use dynamic fields to customize alert properties - automatically parsing out a variable from the payload, every time you create an incident ticket according to Alert Fields settings.
NoteAlias is the user provided unique identifier for open tickets. You must create the following alias {{monitor_id}}_{{monitor_url}} to successfully handle a Site24x7 monitor alert in a single incident ticket, i.e, the complete incident history from incident creation to closure will be tracked in the same ticket.
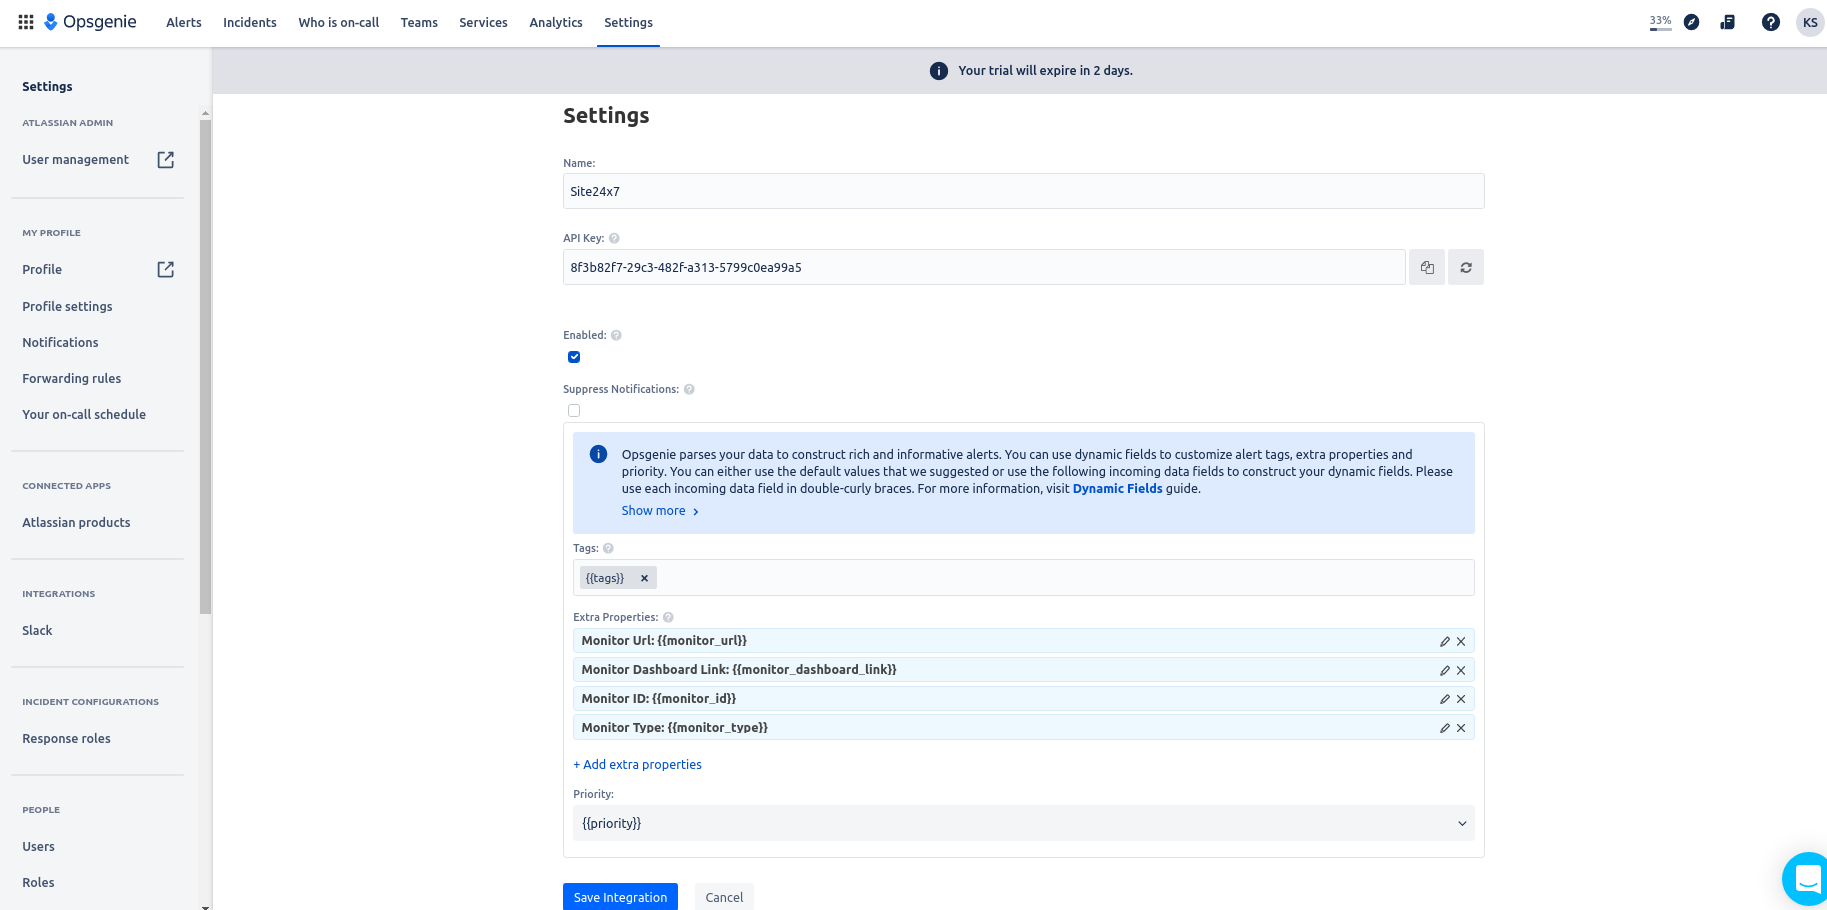
- Click on Save Integration.
Configuring Site24x7 side of the integration
Once, you've generated the Opsgenie WebHook URL, you must login to your Site24x7 account to complete the integration process. Follow the steps listed here:
- Log in to Site24x7 account.
- Navigate to Admin > Third-Party Integration.
- Click the Add third-party integration button. Select Opsgenie from the list.
- Provide the mandatory information in the Opsgenie Integration form to complete the integration process.
- Integration Name: Enter the name of your integration.
- Hook URL: Paste the copied unique Opsgenie WebHook URL here.
Send Custom Parameters: Write specific code in the URL itself and pass the variables using Incident Parameters or Custom Parameters. Learn more about incident and custom parameters.
-
- Select Integration Level: Use the radio button to decide whether to send alerts to Opsgenie account from your chosen Monitors, monitors/monitor groups associated with applied Tags, monitors associated with the selected Monitor Groups, or All Monitors.
For tags associated to your monitor group that have monitors in parent level and a few monitors in sub group level, alerts from only the parent monitors get logged in Opsgenie.
-
- Tags to Be Sent With Alerts: Select the tag keys associated with the monitor that need to be sent with the alert. When an alert is triggered, tags that match with the monitor will be included in the alert notifications.If no tags are selected, all the tags associated with the monitor will be present in the alert notifications.
- Alternate Notification Medium: If the primary third-party notification medium for sending alerts encounters an issue, an alternative notification medium will be activated to ensure that alerts are not missed.
- Trigger Alerts for Monitor Status Change: Use the check boxes to choose the monitor status changes (Down, Trouble, and Critical) for which you'd wish to receive alerts.
- Manually Close Incidents When My Monitor Changes to Up: Use the radio button to decide whether to close incidents manually or automatically in OpsGenie, when the Site24x7 monitor alert changes to "Up". By default, the incidents are resolved automatically in Opsgenie.
5. Click the Save and Test button to save the integration and to receive a test alert. Or, you can click the Save button to finish the integration.
Once the set up process is completed, the Opsgenie integration will be listed in the Third-party integration dashboard. You can setup multiple such Opsgenie integrations in your Site24x7 account.
Suspend/Activate/Delete Opsgenie integration
Follow the steps below to suspend an active Opsgenie integration:
- Log in to Site24x7.
- Navigate to Admin > Third Party Integration.
NoteAll the integrations will be listed here in the Third-Party Integration dashboard.
- You can also initiate a Test Alert to check whether the integration is a success or has any configuration error.
- Click the active Opsgenie integration that you want to suspend.
- Click the Suspend button listed on the top right corner of the integration window.
Note- On suspending your Opsgenie integration, all incident tickets to your Opsgenie account will be stopped temporarily.
- To reactivate a suspended Opsgenie integration, click the Activate button. To delete an integration permanently, click Delete.
Managing Incident tickets in Opsgenie
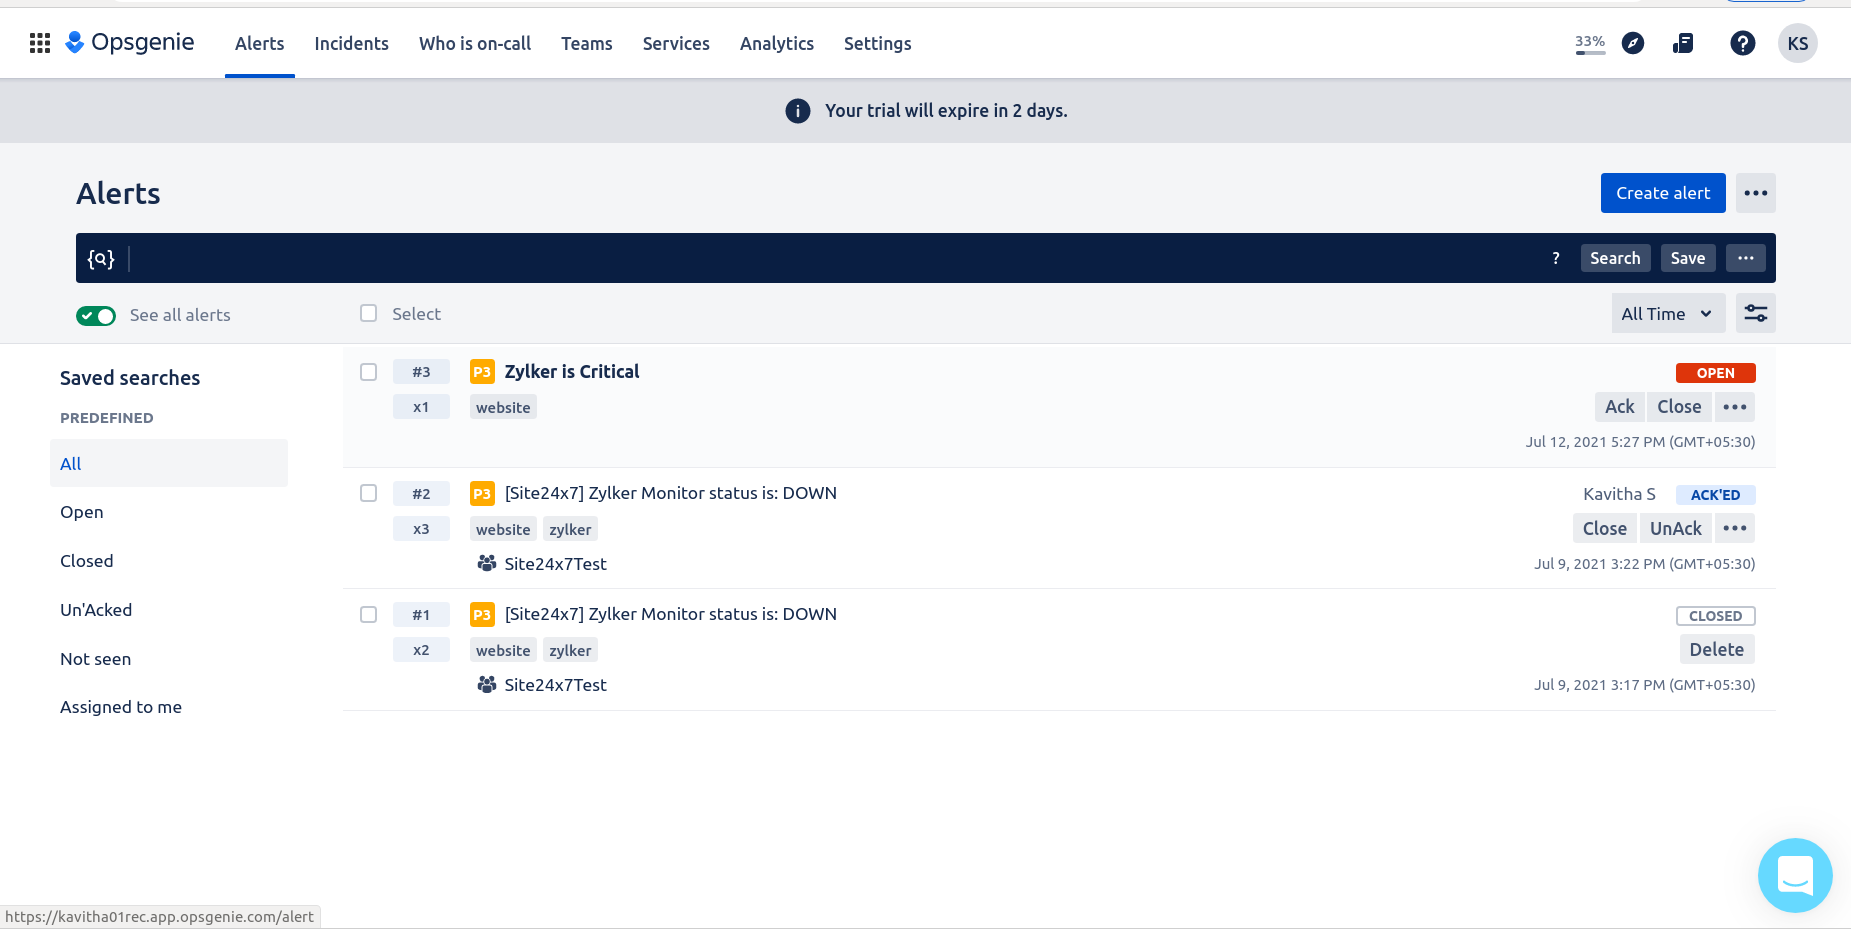
After a successful integration, Site24x7 status alerts are posted to the Opsgenie Hook URL, which inturn creates incident tickets in the Opsgenie account. You can acknowledge an incident ticket in Alerts tab, delegate it to someone, snooze it temporarily, or even delete it permanently. You can gather more insight into the alert and resolve issues faster. After a brief period of outage, when a Site24x7 monitor's status changes to UP, the relevant incident ticket closes automatically inside the Opsgenie dashboard.
Parsing custom parameters in Opsgenie
To pass custom parameters from Site24x7 and use in Opsgenie:
1.Enable Custom Parameters in Site24x7 Opsgeneie Integration page.
2.Fill the custom params you want to pass,
For example:
production = true
server_name = prod_server
3.At Opsgenie side, the parameters can be accessed from any one of the fields as:
{{_payload.custom_parameter.production}}
{{_payload.custom_parameter.server_name}}
