IP address management
IP address management (IPAM) is the process of scanning specific subnets to assess the usage and availability of IP addresses within those subnets. This involves gathering valuable data for capacity planning to ensure that there are sufficient IP addresses to meet both current and future network requirements as well as to optimize IP address allocation.
Prerequisites
- You'll need the On-Premise Poller (version 5.7 and above).
- The Network Module should be upgraded to the latest version. Check if your Network Module needs an upgrade.
- The On-Premise Poller and the Network Module must be up and running.
- To resolve IP addresses in a subnet, configure a local DNS server in the IPAM settings.
Use cases
Consider a growing organization with an expanding network infrastructure that needs to allocate, track, and monitor IP addresses efficiently. In this scenario, let's explore how IPAM can benefit the organization:
- Maintaining an accurate inventory of all the IP addresses: An IPAM tool enables the organization to maintain an accurate inventory of all the IP addresses within the established subnets, offering visibility into their statuses and allocation.
- Capacity planning: The organization can assess whether subnets are being overutilized or underutilized, allowing it to optimize IP address allocation and usage.
- Security and compliance: An IPAM tool empowers the organization to enforce strict controls over IP address access, ensuring that only authorized users can utilize IP addresses. This helps in mitigating security risks, preventing unauthorized IP address usage, and ensuring compliance with regulations.
How IPAM in Site24x7 works
You can monitor any subnet within your organization by adding it as an IPAM monitor in Site24x7. Additionally, if you add all the routers in your network, the IPAM tool will automatically discover the available subnets. These subnets can be found under Discovered Subnets and added as IPAM monitors directly.
Once a subnet is added, Site24x7 will use ICMP to monitor the availability of the IP addresses within the subnet. Site24x7 also uses deep scanning techniques to display the IP and DNS details as well as any events related to changes in the statuses of the IP addresses.
Adding a subnet
To begin, add your subnet as an IPAM monitor in Site24x7.
Viewing subnets
- Log in to your Site24x7 account.
- Navigate to Network > IPAM > Subnets (Fig. 1).
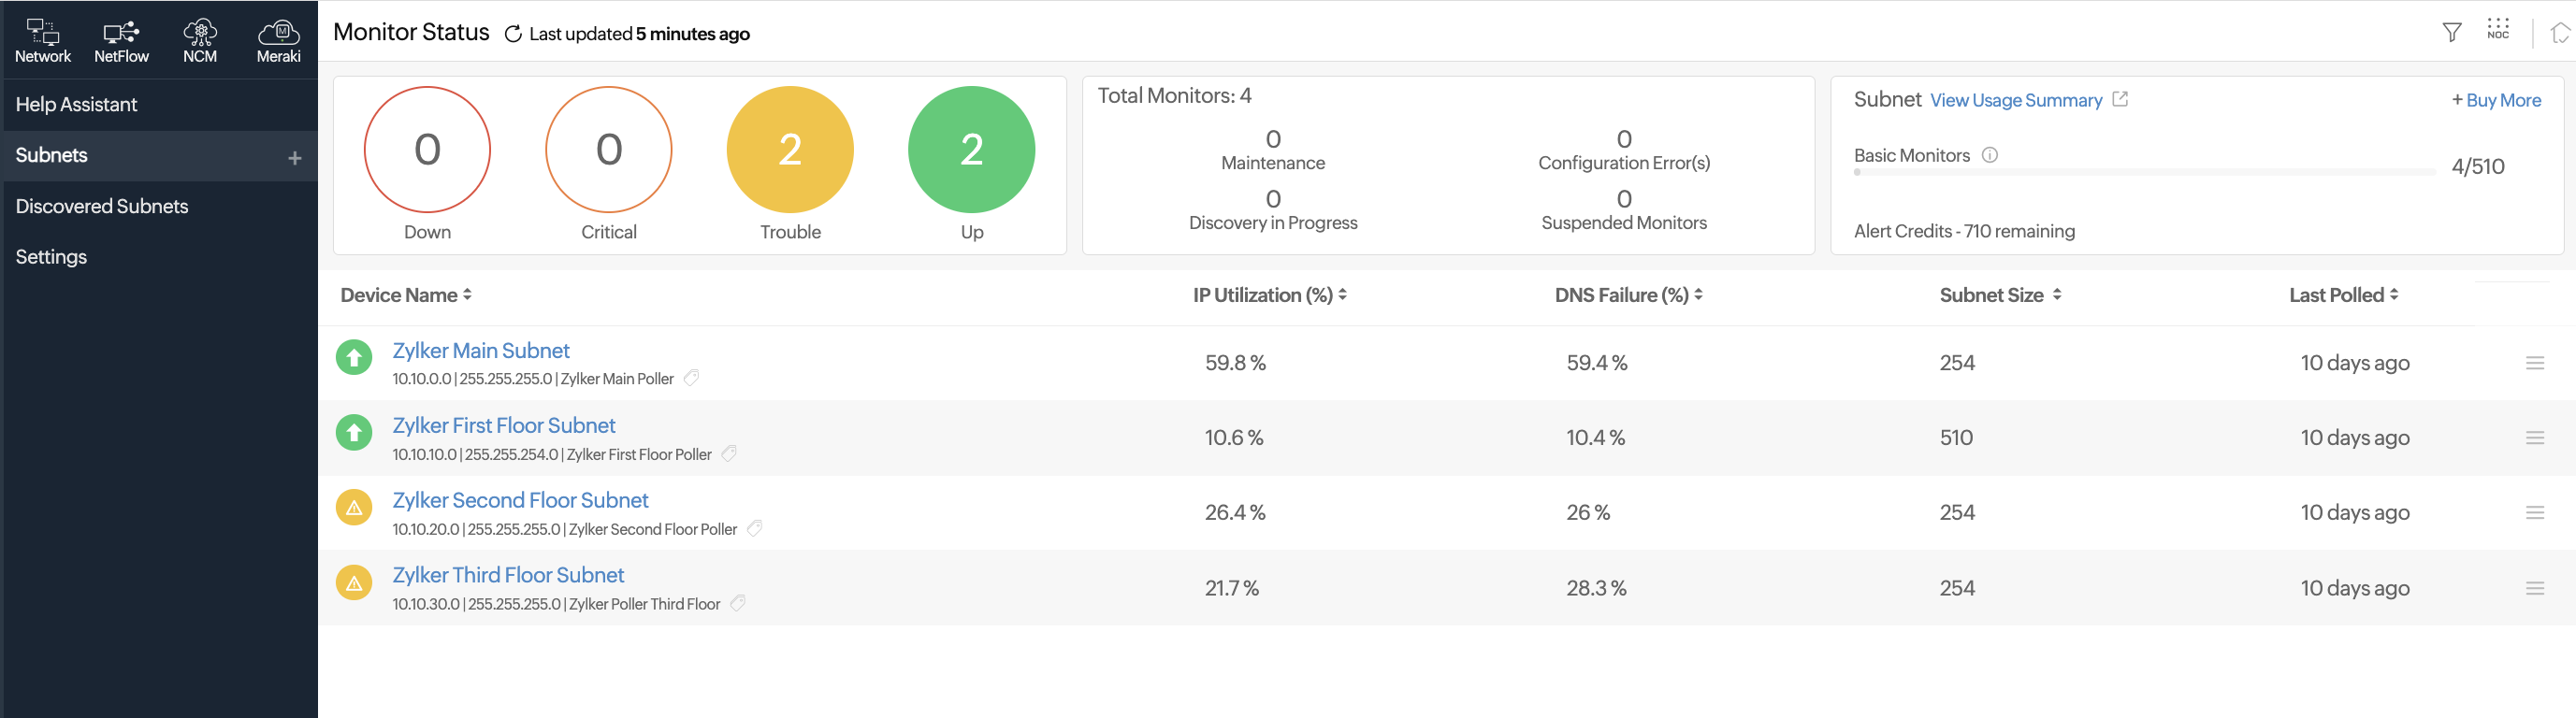
Figure 1. View a list of all the subnets monitored by the IPAM tool. - Click the required subnet. The Summary page will open (Fig. 2).
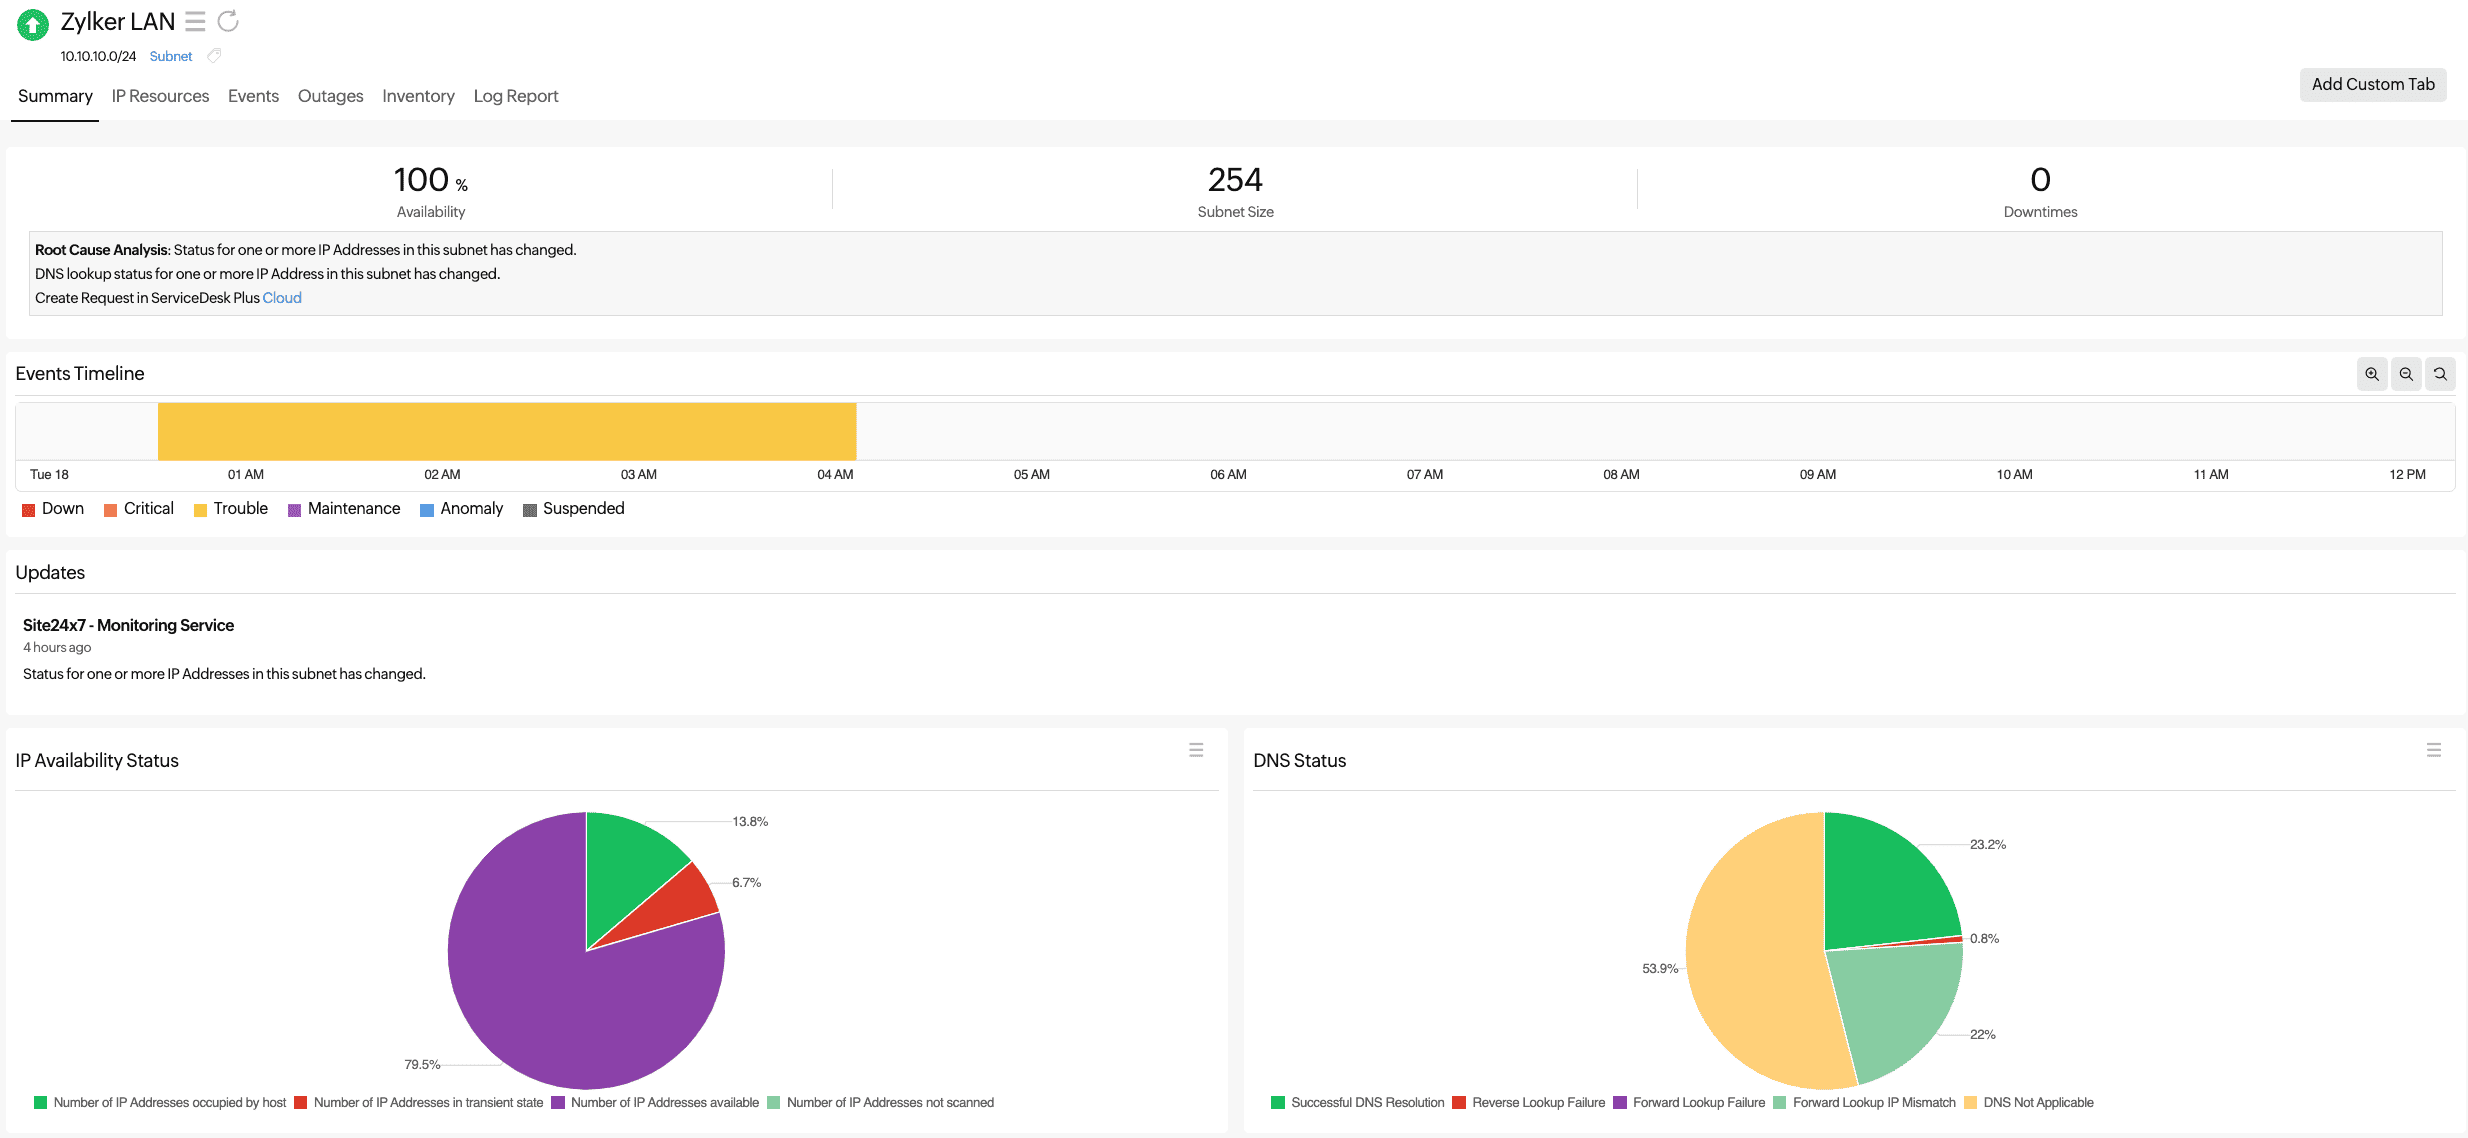
Figure 2. View the subnet details.
IP Resources
- Navigate to Network > IPAM > Subnets.
- Click the required subnet and navigate to the IP Resources tab. Here, you can view details like the IP Address, MAC Address, DNS Name, Last Alive Time, Status, and Asset Tag for each IP in the subnet.
- Sort any column as needed. To filter resources, provide the condition in the text box below each column and click the Filter button to the right.
- If no results were found with the applied criteria, click the refresh icon
 beside the monitor name and try again with different criteria. Click an IP address to view the Resource Details.
 - Click Edit or the pencil icon
 beside the fields where it is available (Fig. 3).
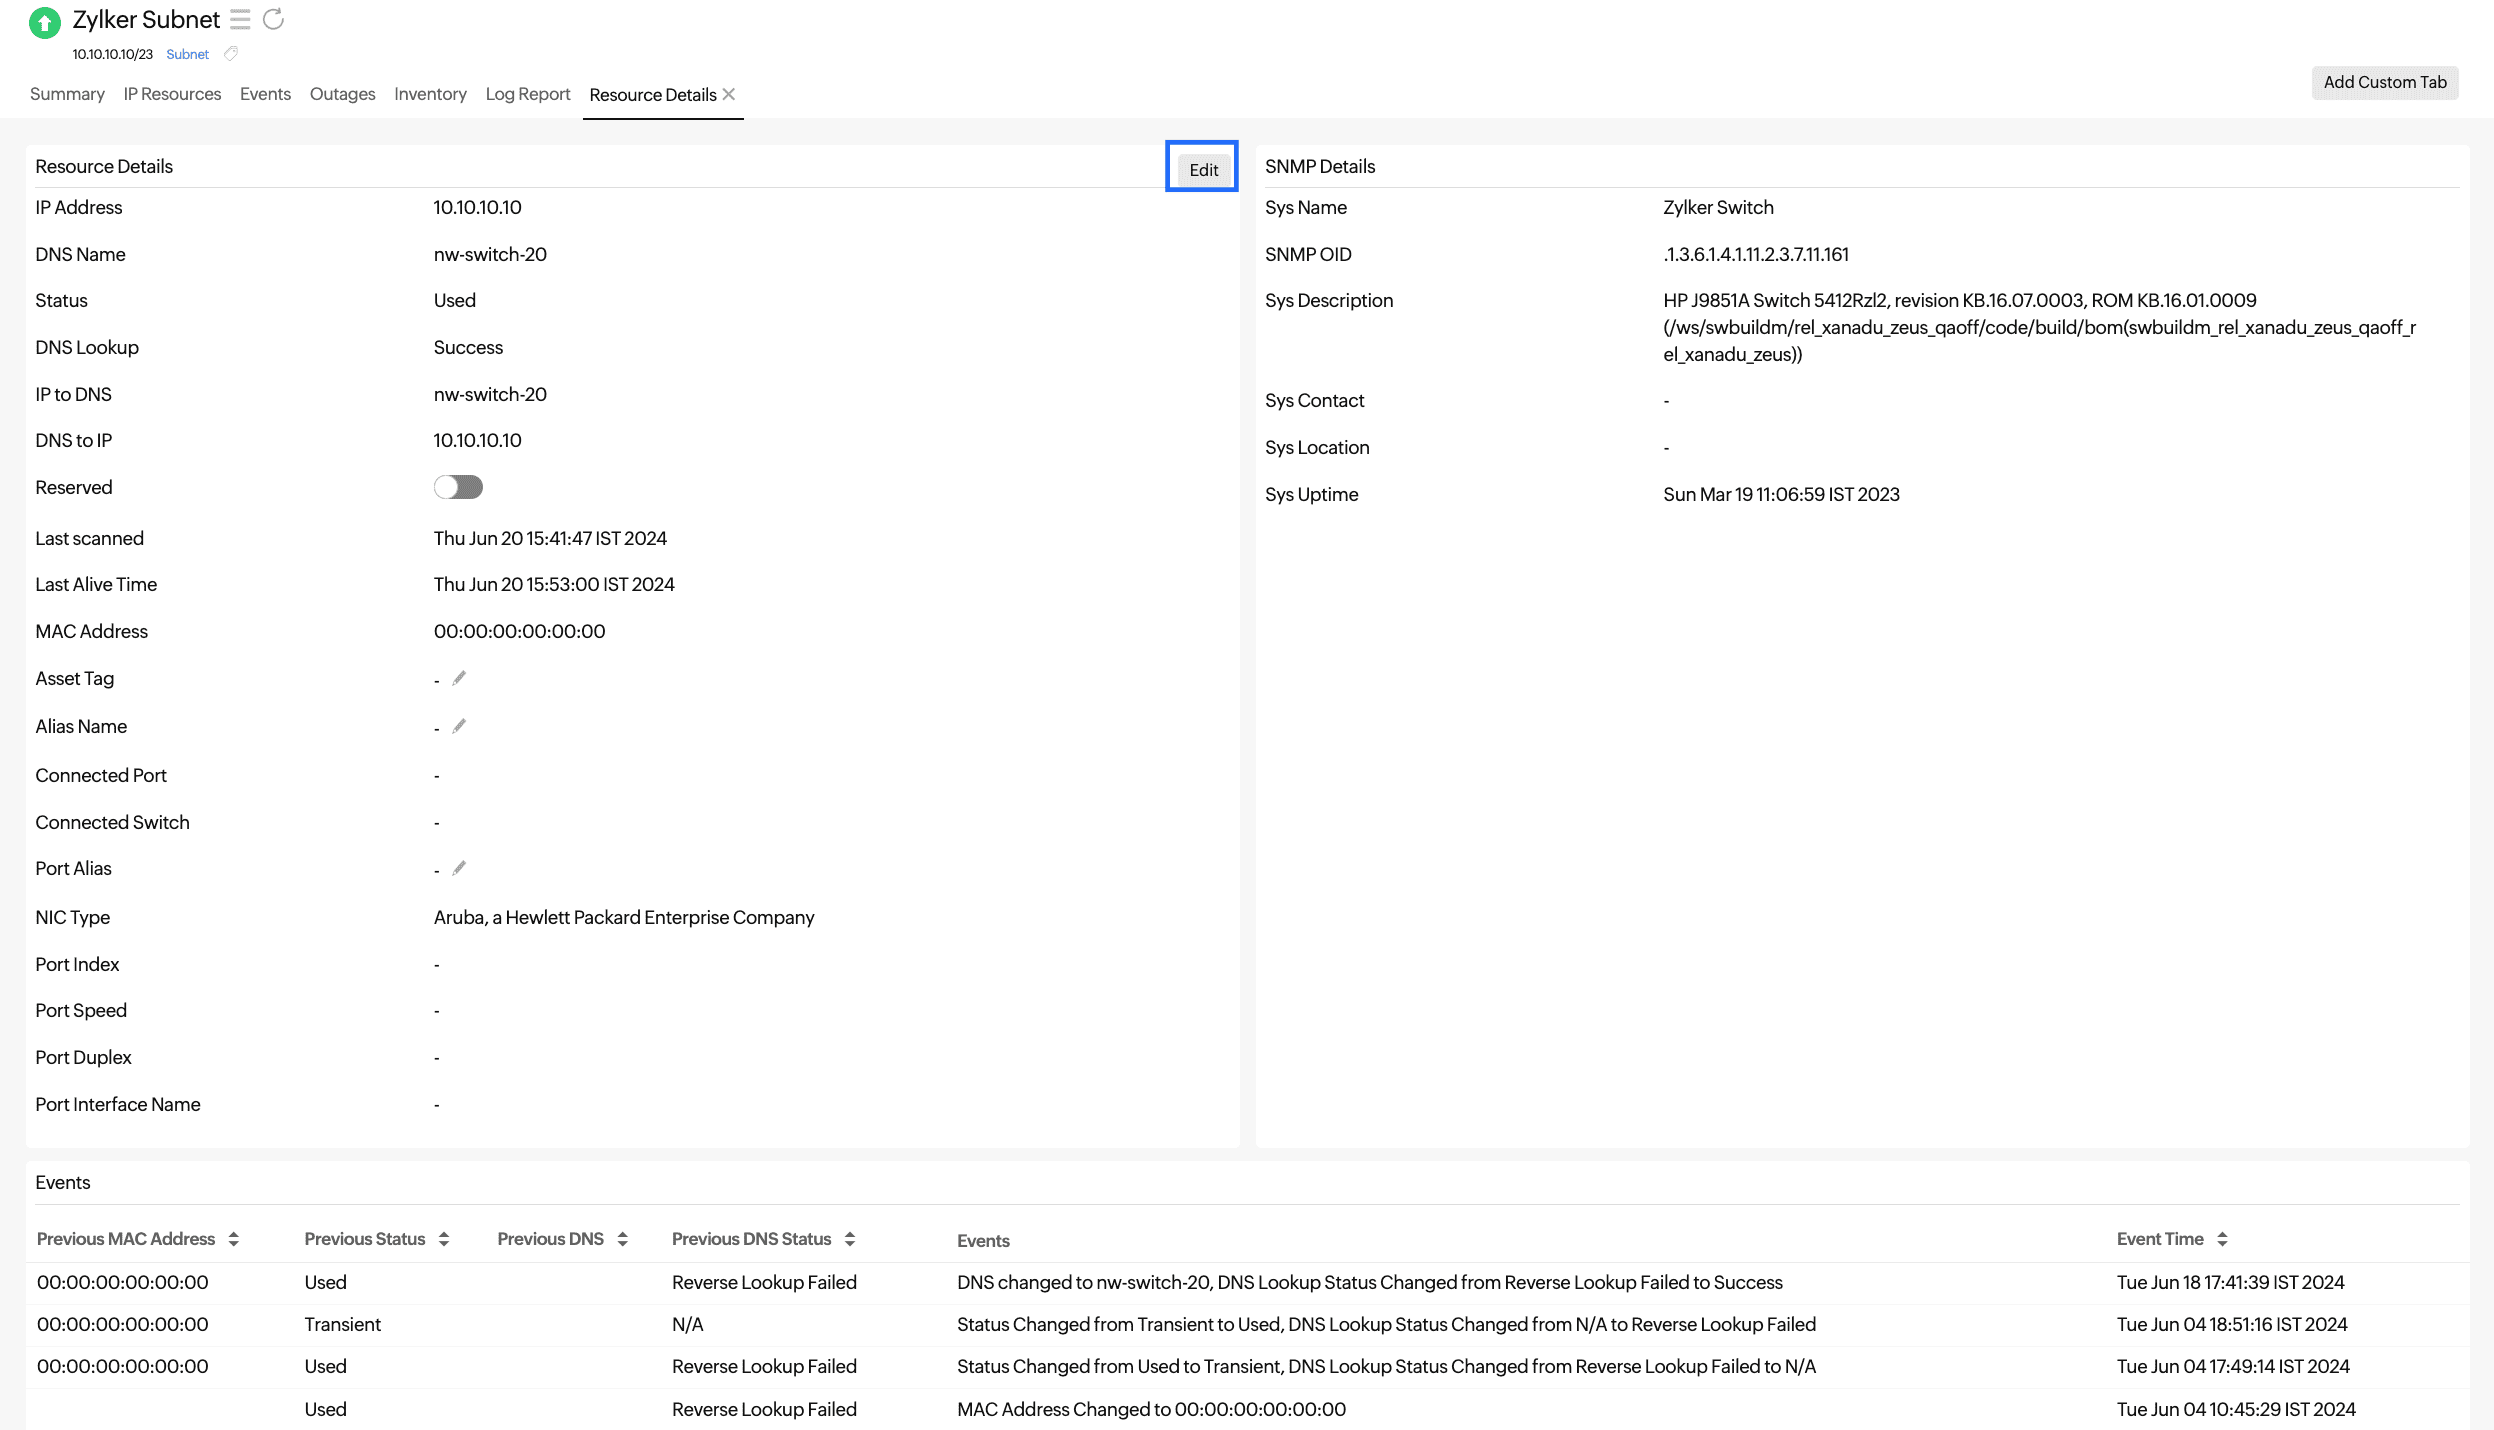
Figure 3. Edit the Resource Details.
Events
- Navigate to Network > IPAM > Subnets.
- Click the required subnet and navigate to the Events tab. Here, you can view all the events that occurred at any IP address of the subnet, like changes in the Previous MAC Address, Previous Status, Previous DNS, Previous DNS Status, Events, and Event Time.
Outages
- Navigate to Network > IPAM > Subnets.
- Click the required subnet and navigate to the Outages tab.
- View details about outages and click the hamburger icon
 beside a record to add, edit, or delete comments.
Inventory
- Navigate to Network > IPAM > Subnets.
- Click the required subnet and navigate to the Inventory tab. Here, you can view details about the subnet, such as the Monitor Licensing Category, Monitoring Locations, Threshold and Availability Profile, Notification Profile, and User Alert Group.
- Edit the fields by clicking the pencil icon beside them.
- Add notes by clicking Add Note.
Log Report
- Navigate to Network > IPAM > Subnets.
- Click the required subnet and navigate to the Log Report tab. Here, you can view log reports and filter for a required time period and availability.
- Click Download CSV to download the report.
- Click the table icon
 to add or remove the Reason column from the report.
Reports
Navigate to Reports > Subnets to view the following reports:
- Summary Report
- Subnets by IP Utilization
- IPAM Resources Report
Displays a list of IP addresses in each subnet monitor. You can filter according to the Resource Status, which can be All, Used, Available, or Transient. - IPAM Available Resources Report
Displays a list of IP addresses in each subnet monitor. You can filter according to the Resource Status, which can be Available, Transient, or Both.