Configuration Rules
Using the Site24x7 Configuration Rules for MSPs, you can automate the configuration settings for all the customer's monitoring resources. This helps MSP Admins avoid the tedious process of editing multiple customer's monitors to associate Notification Profile or Threshold Profile, Check Frequency, or add Third-Party Services.
Key benefits
- Automated rule application: Create a rule, and it is automatically applied across all customer accounts, eliminating the need for manual configurations.
- One-time rule setup: As an MSP Admin, you can set up a rule once, and it will automatically apply to all your customer accounts.
- Time-saving process: Avoid the tedious task of switching between customer accounts to create rules individually, saving valuable time and effort.
Use case
Imagine an MSP Admin managing multiple customer accounts, each with unique monitoring needs. A new customer adds a monitor for their web application, requiring a specific threshold profile. Instead of manually configuring these settings, the Admin utilizes Configuration Rules to streamline the process. They can create a new rule that matches the new monitor's requirements and quickly associate it with the customer's account. This ensures the correct configurations are applied instantly. With Configuration Rules, changes are implemented seamlessly across all the customer's monitors, saving time and providing consistent service delivery.
Behavior of configuration rules
- Viewing rule created by MSP admin
- When a rule is created by the MSP Admin, all customers can view the rule in their respective configuration rules pages.
- Customer adds a new rule
- If a customer adds a new rule, it will have the highest priority.
- The rule added by the MSP Admin will automatically move to the next priority level.
- Priority follows the principle: "First added, first priority."
- Customer changes rule priority
- If a customer changes the priority of rules, the updated order will apply only to the customer's configuration.
- Customer deletes a rule
- Customers can delete rules created by the MSP Admin.
- When a customer deletes such a rule, it is removed only from their configuration.
- Customer edits a rule
- If a customer edits a rule, the changes are applicable only to their configuration.
- The original rule created by the MSP Admin remains unaffected for other customers.
- MSP Admin modifies rule or changes rule priority
- When the MSP Admin modifies a rule or changes its priority, the updates are reflected across all customers who have the rule in their configurations.
- MSP Admin deletes a rule
- If the MSP Admin deletes a rule, it is removed from the configuration rules list of all customers.
- MSP Admin executes a rule
- When the MSP Admin runs a rule, the changes are reflected in the monitors of all customers who have the rule.
This configuration rule is not based on customer groups.
How does it work?
Configuration Rules operate by establishing specific criteria and linking corresponding actions to them.
Criteria
Criteria are the standards used to create rules. We provide a predefined set of criteria for you to select from. Depending on the defined conditions (AND or OR), either one or all of the criteria will be considered when executing an action.
Action
Actions are triggered when the criteria match the defined conditions. An action can involve anything from assigning a Threshold Profile, Check Frequency, or Notification Profile to associating Third-Party Services with a customer. You can link multiple actions to a single criterion or vice versa.
Based on your selections, attributes such as Third-Party Services will be added or removed from the existing monitor configuration. However, attributes like Threshold Profiles, Check Frequency, and Notification Profiles will be replaced with the ones specified in the rule.
Example: Consider an MSP Admin named Zylker who manages multiple customers: Customer1, Customer2, and Customer3. A new customer, Customer4, requires adding a Threshold and a Check Frequency set to five minutes. The admin needs to ensure this threshold is applied across all his customers. He can achieve this using configuration rules based on the following conditions:
Condition: OR
If the condition is defined as OR, the action will only be carried out when any one criteria is met.
Criteria 1: The Type is Website
Condition: The Monitor's Name is Zylker
Action 1: Set the Check Frequency to 5 minutes
Action 2: Associate Threshold Profile with Zylker Threshold
When the criteria are met and the monitor name is Zylker, the actions to set a 5-minute check frequency and associate it with the threshold profile Zylker Threshold will be executed automatically for all customers managed by the MSP Admin.
Condition: AND
If the condition is defined as AND, the action will only be executed when all specified criteria are met.
Adding a configuration rule
- Log in to your Site24x7 MSP Account.
- Click the Admin > Configuration Rules listed in the dock.
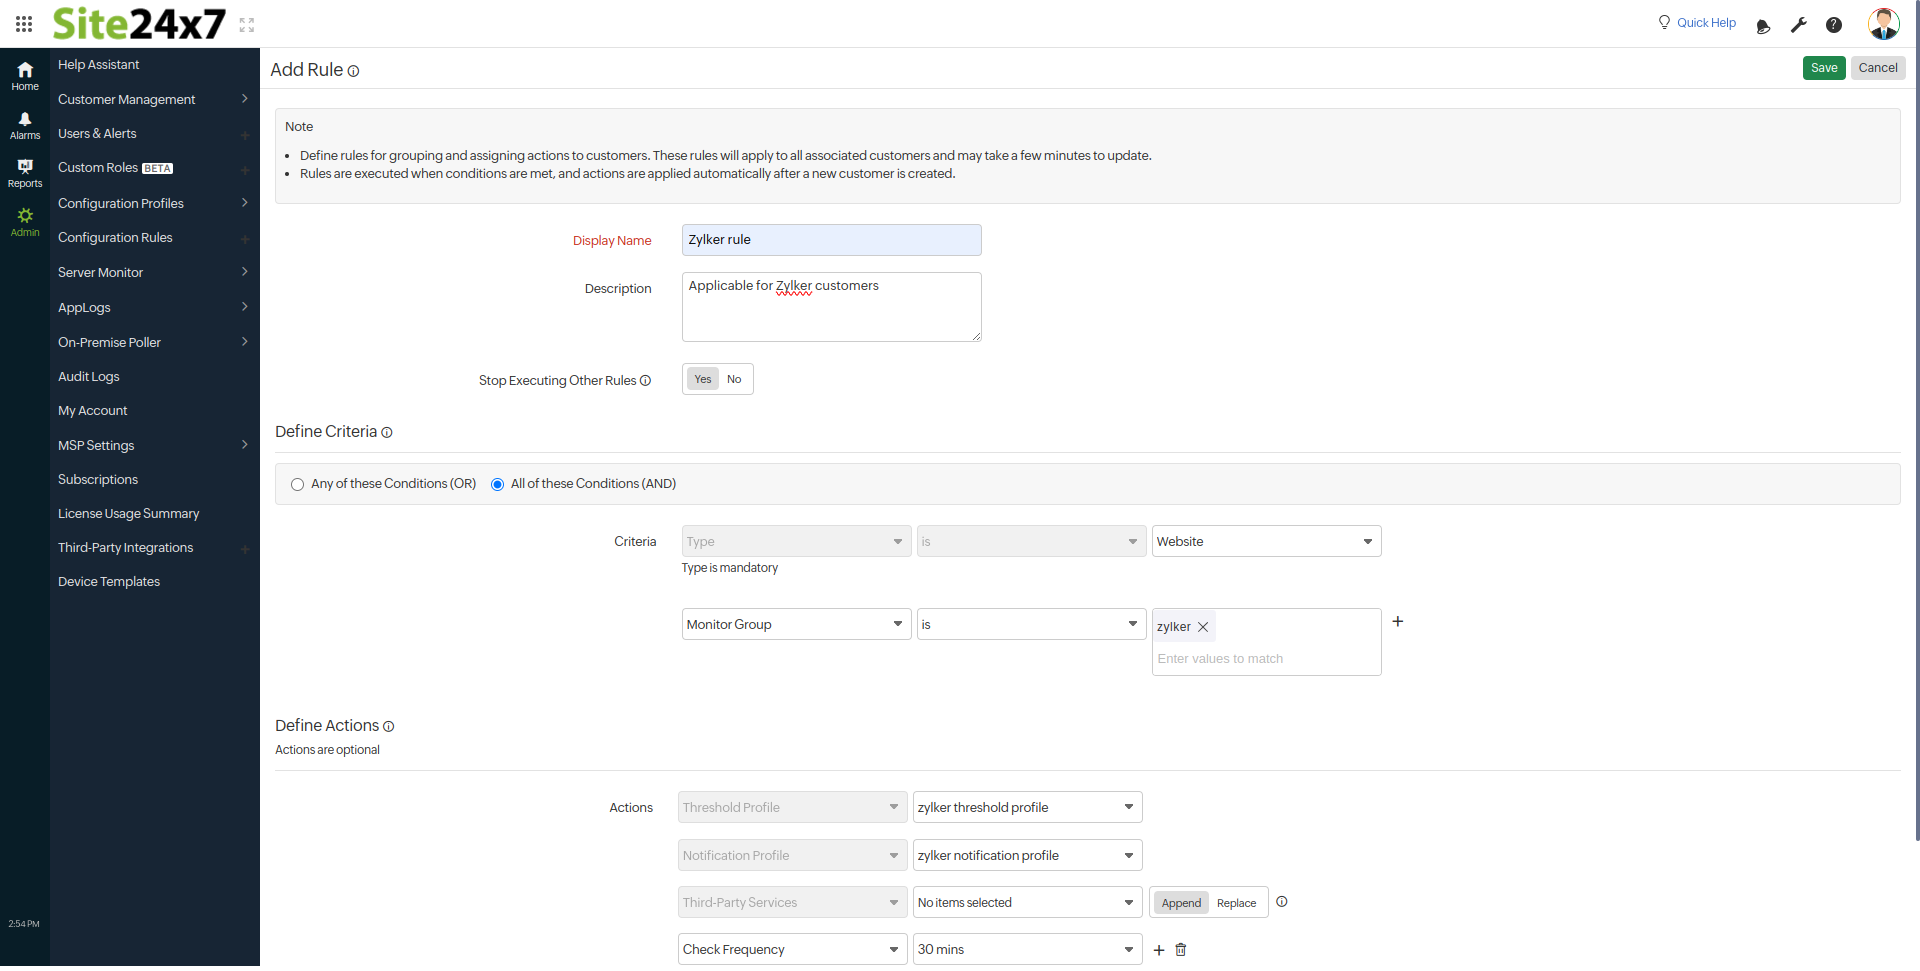
- Provide the basic details for configuring a rule:
- Display Name: Provide a name to identify the rule.
- Description: Provide a short description stating the purpose of the rule.
- Stop Executing Other Rules: Each rule is assigned a priority. When a rule matches the configuration, this option prevents further checks on other rules with a lower priority. If multiple rules with different priorities override actions like thresholds or notification profiles, you have the option to stop executing the other rules. Refer to the priority section below for more details.

- Define Criteria:
- Choose Any of these Conditions (OR) to select any one satisfying criteria or All of these Conditions (AND) to select all the satisfying criteria.
- Criteria: Select from any predefined attributes. The type is mandatory. Add multiple conditions by clicking the + icon to define the criteria for which the rule will apply.
- Define Actions:
- Select any predefined action from the drop-down list and assign a value to it. You can add multiple actions to a single rule by clicking the + icon.
- Click Save. Alternatively, you can click Save and Run Rule to immediately apply this rule to any of the existing monitors.
- These rules will apply to all associated customers under the MSP Admin and may take a few minutes to update.
- Rules are executed when the conditions are met, and actions are automatically applied whenever a new customer is created.
Viewing configuration rules

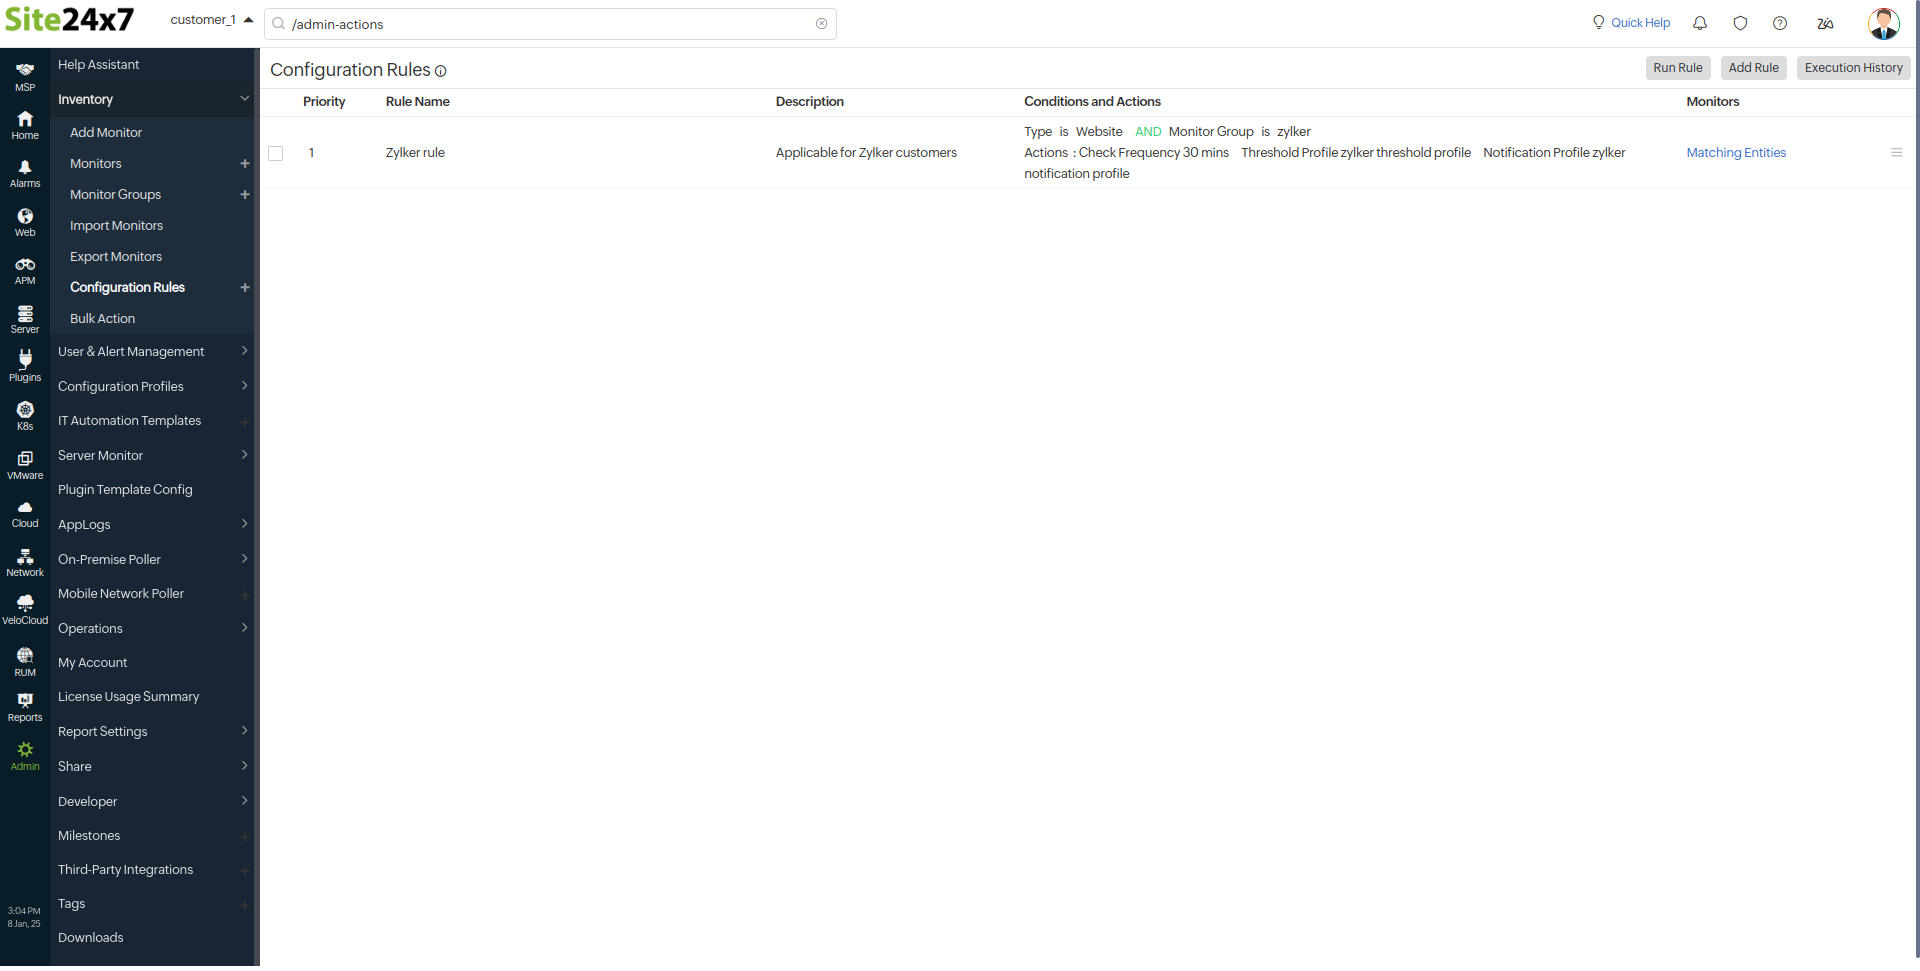
Once a rule is created, it will be listed under Admin > Configuration Rules. You can access the following functionalities here:
- Priority: The lower the number, the higher the priority. Rules are checked against monitor configurations based on their assigned priority. To prevent actions from being overridden by rules with lower priority, you can enable the option Stop Executing other Rules to stop executing other rules.
For example, consider two rules: the first rule has a higher priority and no action mapped, with the Stop Executing Other Rules option enabled. The second rule, which has actions mapped to monitoring (for instance, to monitor SQL), will not be executed because the higher priority rule takes precedence.
You can modify the priority by clicking on the priority number. - Execution History: Click the Execution History button located in the top-right corner. A list of rules with actions that have been executed by the MSP Admin in the last seven days will be displayed.
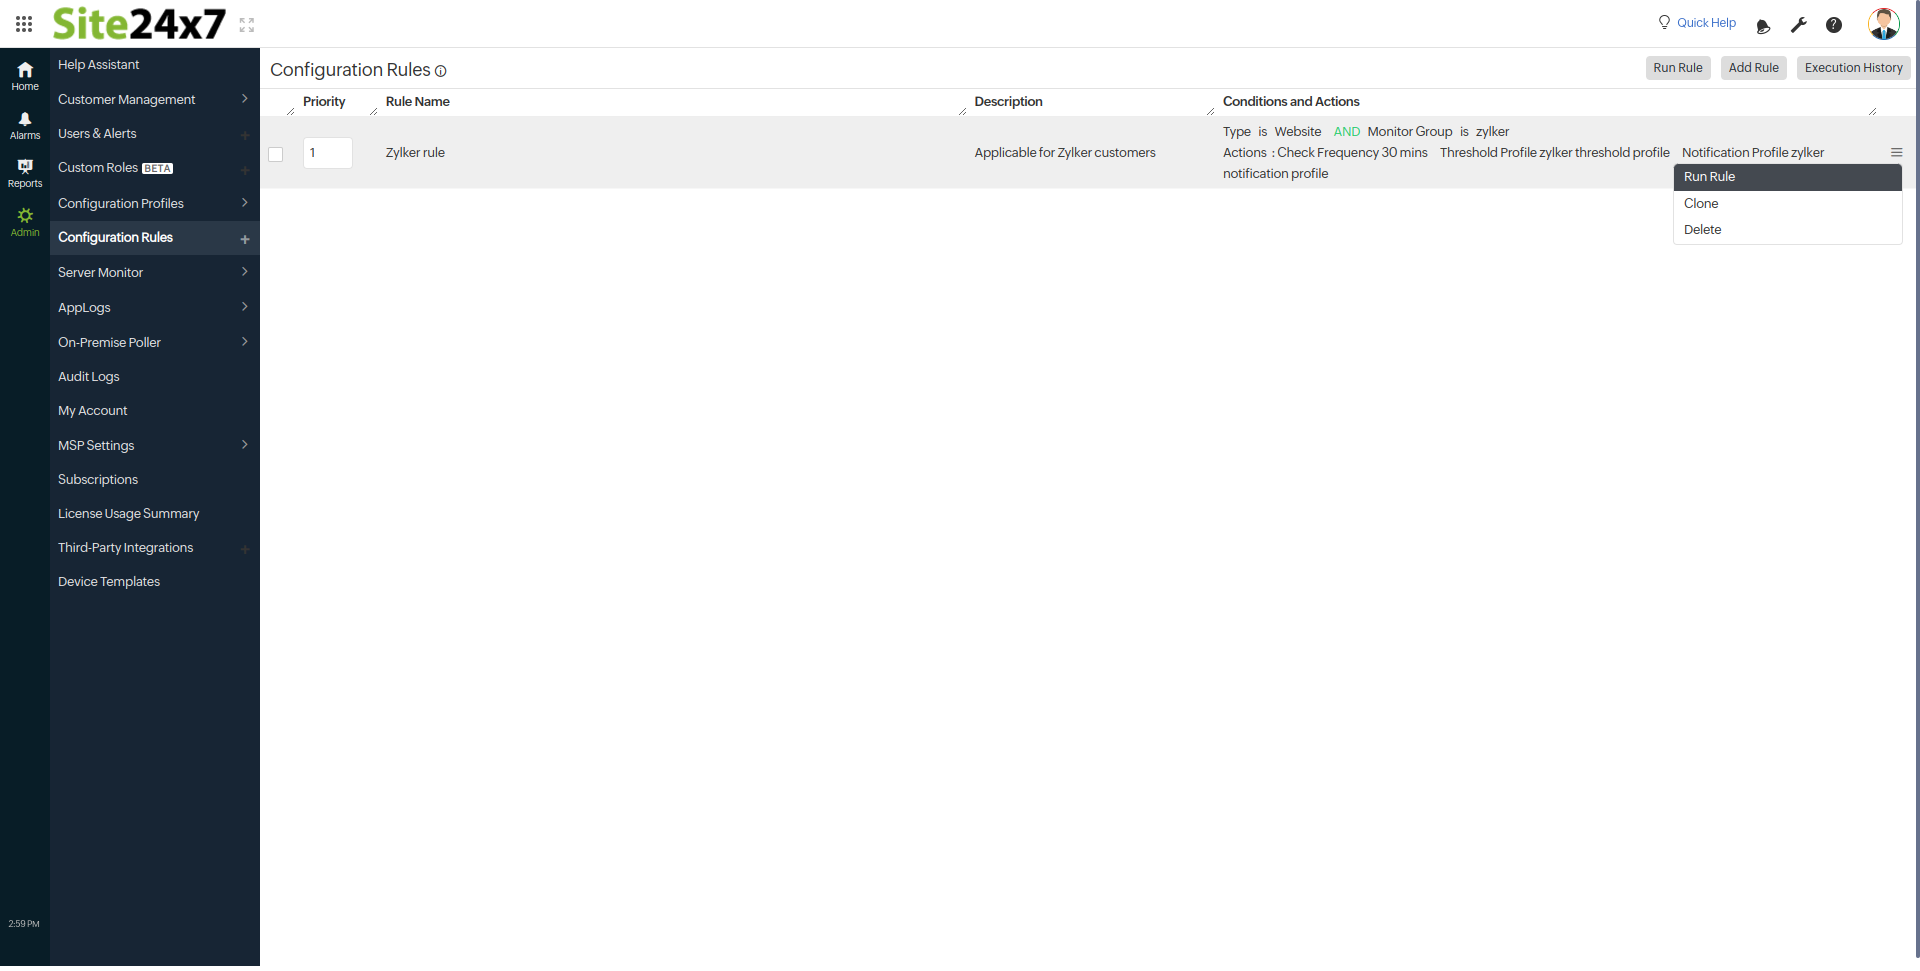
- Click on the hamburger
 icon to access the below options:
- Run Rule: Select this option if you wish to execute the rule for all customers.
- Clone: This option creates a copy of the selected rule, allowing for quicker creation of rules.
- Delete: Choose this option to delete the rule.

- Add Rule: Click on this button to add a new configuration rule.
Editing a configuration rule
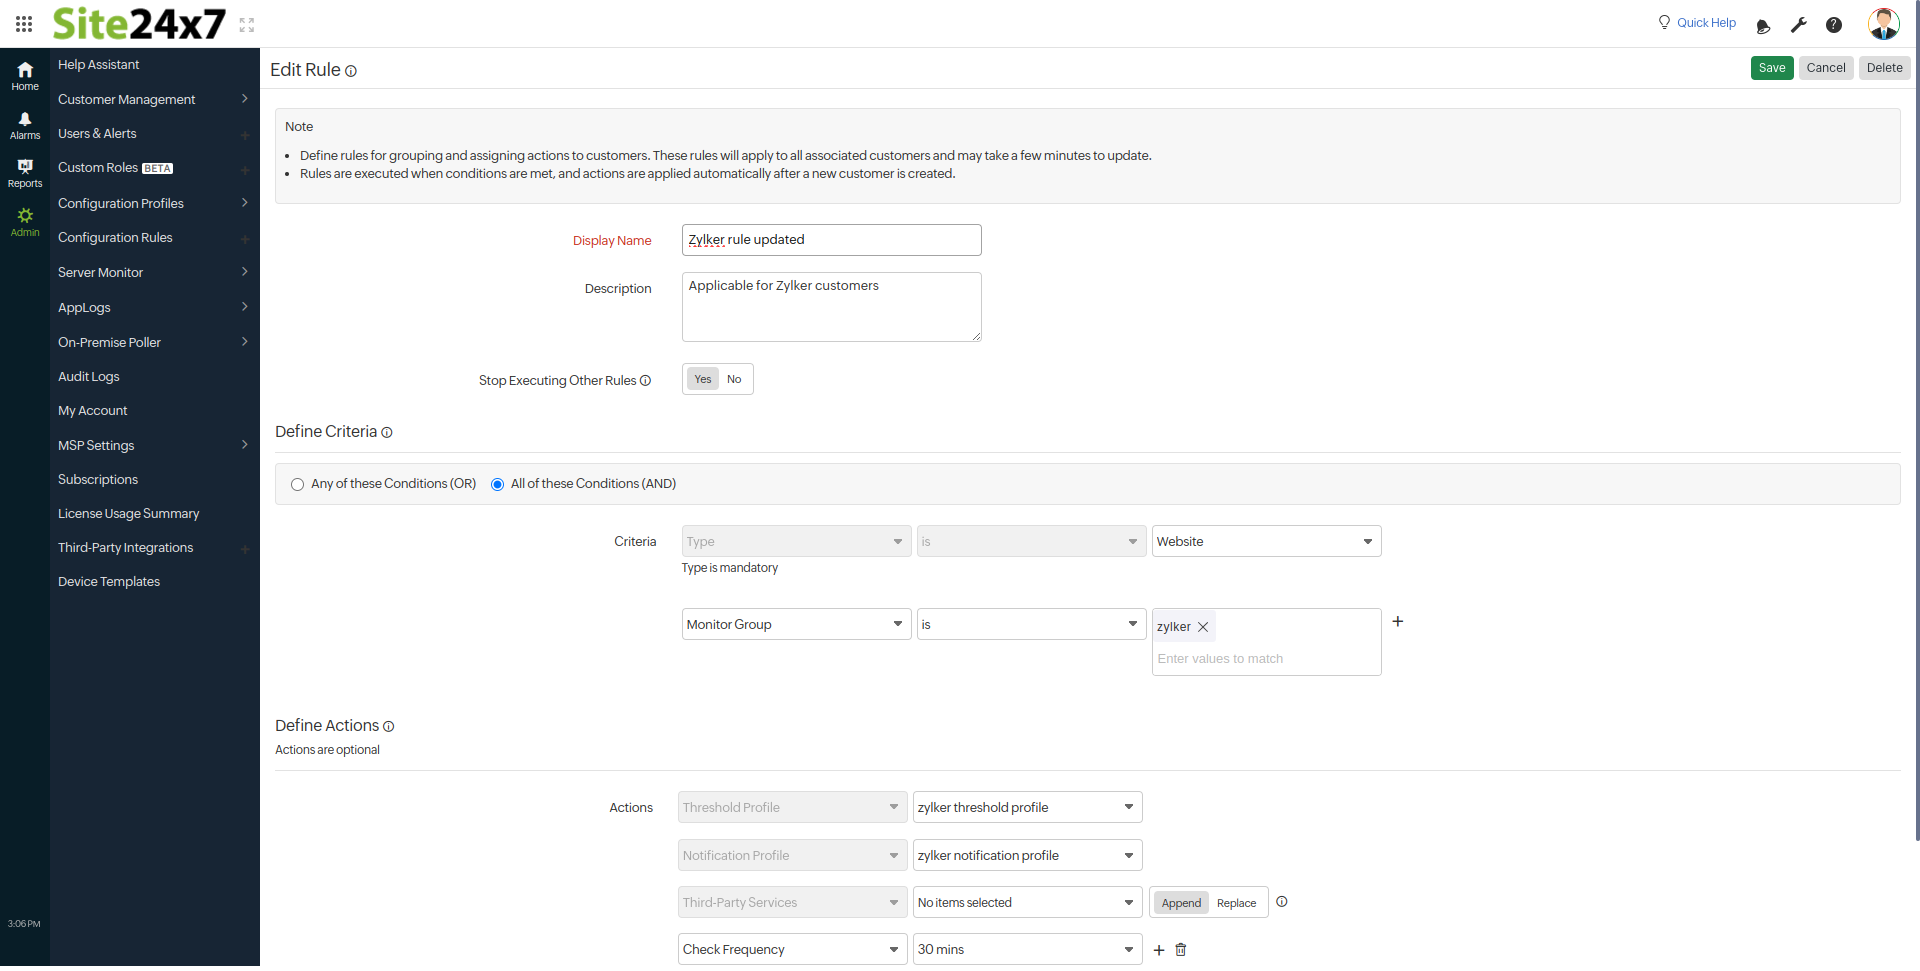
- Navigate to Admin > Configuration Rules.
- Click on the rule that needs to be modified.
- Make the necessary changes, and click Save.

