Adding a subnet as an IPAM monitor
IP address management (IPAM) enables network administrators to view the availability and DNS details for each IP in their network. You can directly add a new subnet or already discovered subnets in Site24x7 as IPAM monitors.
Here’s a video that walks you through exactly how to add an IPAM monitor within Site24x7:
Adding a new subnet
- Log in to your Site24x7 account.
- Navigate to Network > IPAM > Subnets.
- Click the plus + icon beside Subnets.
- Provide the following details:
- Display Name: Provide a name to identify the subnet.
- Subnet Mask: Select an appropriate value from the drop-down menu.
- Subnet Address: Provide the subnet address.
- Description (Optional): Provide a description for the subnet.
- Location (Optional): Provide the physical location of the subnet.
- VLAN Name (Optional): Provide the VLAN name associated with the subnet.
- Check Frequency: Select the frequency to scan the subnet from the drop-down menu.
- Monitoring Locations: Select the On-Premise Poller that will be used for monitoring the subnet from the drop-down menu. You can also add a new On-Premise Poller by clicking the plus + icon or edit it by clicking the pencil
 icon beside the field.
 - Monitor Groups (Optional): To organize the monitor in a monitor group, select an option from the drop-down menu or add a new group by clicking the plus + icon beside the field.
- Dependent on Monitor (Optional): Select an option from the drop-down menu to suppress the number of alerts based on the down status of that monitor.
- In the Configuration Profiles section, provide the following values:
- Threshold and Availability: Select an existing profile from the drop-down, edit it by clicking the pencil icon beside the field, or add a new one.
- Tags: Select one from the existing tags or click Add Tag beside the field to add a new one.
- IT Automation: From the first drop-down menu, select the type of automation and then the required parameters for automating routine tasks.
- Threshold and Availability: Select an existing profile from the drop-down, edit it by clicking the pencil
- In the Alert Settings section, provide the values for the following fields:
- User Alert Group: Select the groups that must be notified when there's an alert.
- On-Call Schedule: Select an On-Call Schedule to send alerts to users available during a particular shift from the drop-down, or click the plus + icon beside the field to add a new one.
- Notification Profile: Select a value to specify to whom or how the notifications must be sent. You can edit an existing Notification Profile by clicking the pencil icon, or click the plus + icon to add a new one.
- Click Save.
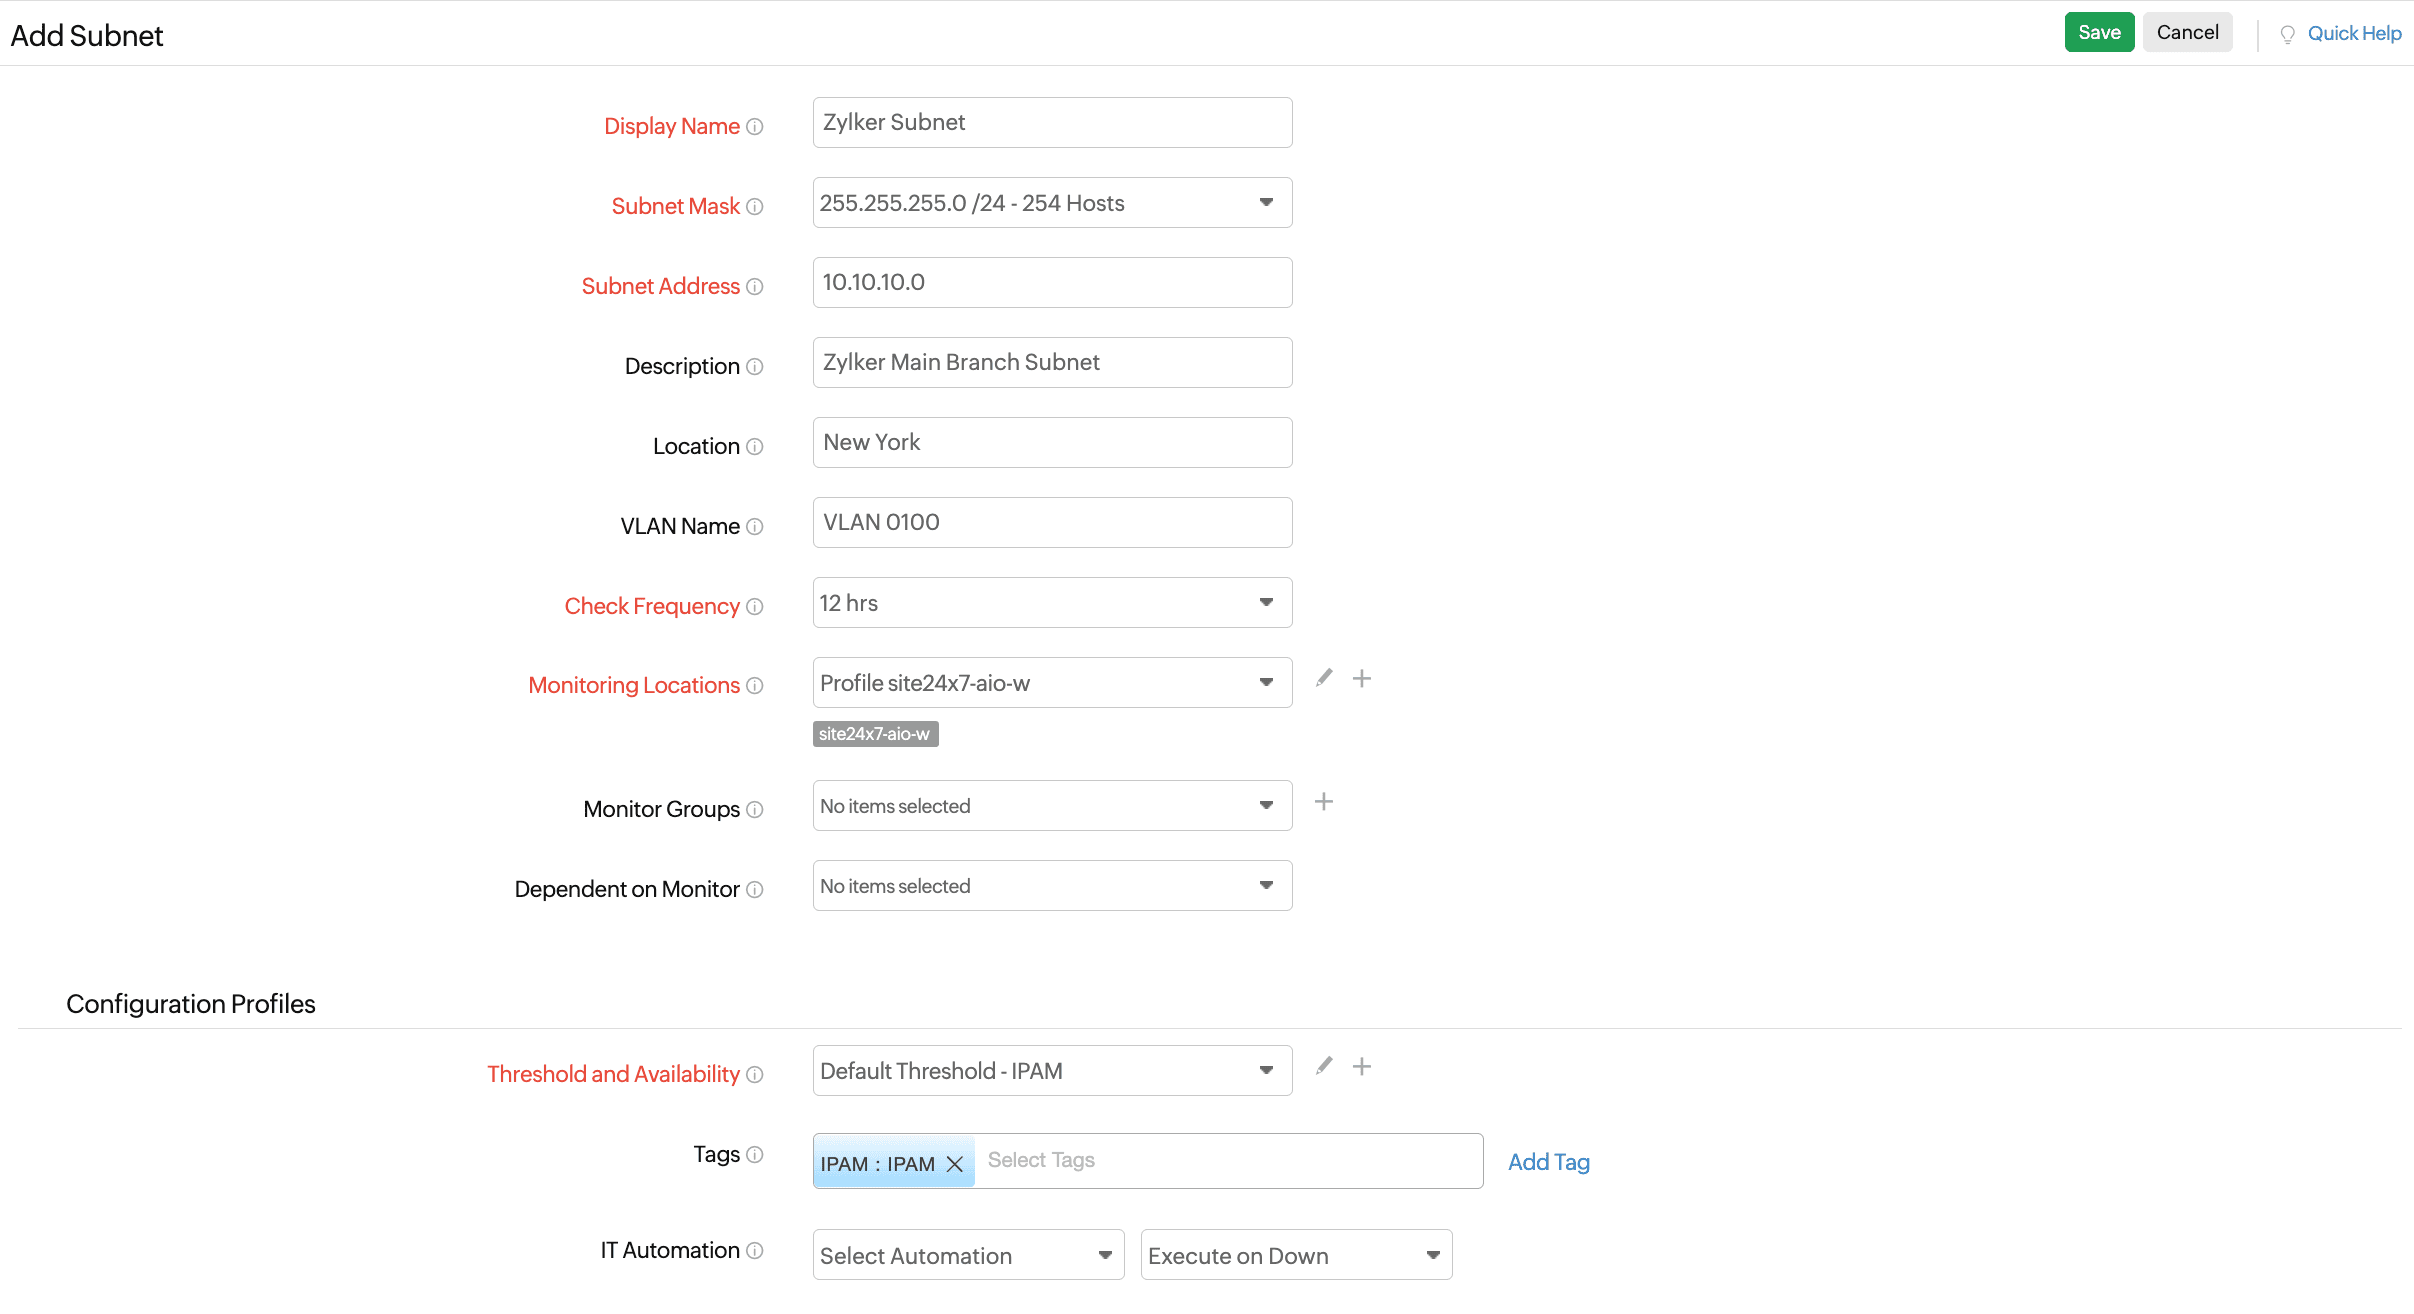
Figure 1. Add Subnet
Adding a discovered subnet
- Navigate to Network > IPAM > Discovered Subnets.
- Click the plus + icon in the Action column beside the subnet that you wish to monitor in IPAM.
- The Add Subnet form will open as shown in Figure 1 with the Subnet Address populated.
- Fill in the required details as mentioned in the previous section.
- Click Save.
Related articles
-
On this page
- Adding a new subnet
- Adding a discovered subnet