Plugin bulk installation for Linux
If you want to install a plugin on multiple servers at once, you can do so via one of the following methods:
- The Site24x7 web client with the Server Monitoring agent
- Ansible
1. Via the Site24x7 web client with the Server Monitoring agent
You can use this method to bulk-install plugins using the Site24x7 web client, which leverages the Server Monitoring agent, and adds the plugins to the servers on your account.
Prerequisites
- The Site24x7 Linux monitoring agent should be installed on the servers you are planning to install the plugins on.
- Ensure that the IT automation module is enabled for the Linux monitoring agent.
- Ensure that you meet all the prerequisites of the plugin you want is install.
Steps to bulk-install
- Download the required plugin files from our GitHub repository for the plugin you want to install and place them in a new folder with the same name as the plugin files. Then, zip the folder.
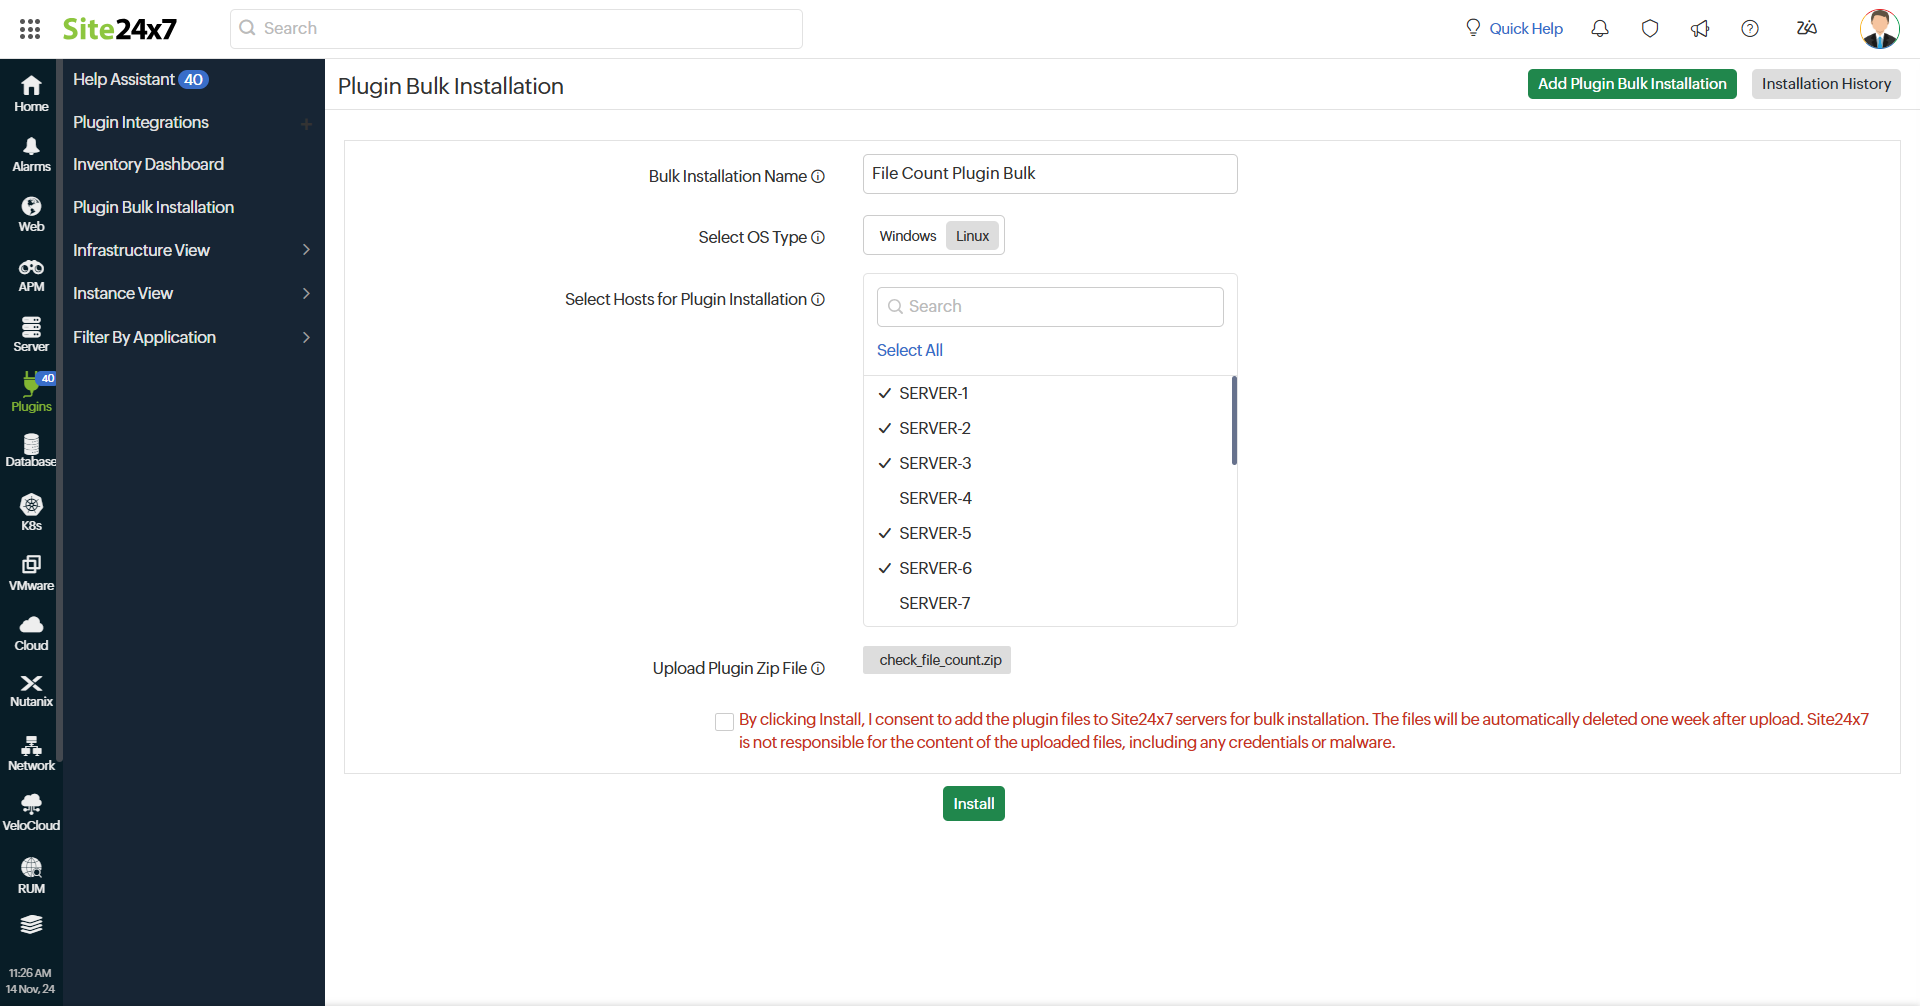
For example, if you download check_file_count.py and the check_file_count.cfg from the GitHub repository, configure the check_file_count.cfg file, and place the files in a folder named check_file_count. Then, zip the check_file_count folder.
You will need this zip file to install the plugin in Step 4. - On the Site24x7 web client, navigate to Plugins > Plugin Bulk Installation.
- In the resulting fields, provide a name for the bulk installation, choose the OS type, and select all the hosts you want to install the plugin on.
- Upload the plugin zip file you created in Step 1.
- Read and check the disclaimer and click Install. The uploaded plugin will be installed on the selected hosts. If a plugin with the same name already exists on any of the selected hosts, it will be replaced by the new plugin.
To check the installation status, click the Installation History tab.

Site24x7 is not responsible for the content of the uploaded files, including any credentials or malware. The uploaded plugin zip file will be unzipped and executed on the selected hosts' Server Monitoring agent plugin folder. The uploaded files for installation will be automatically deleted one week after upload.
2. Via Ansible
If you're using Ansible to manage your Linux servers, you can use this method to install a plugin from a controller node to target hosts using an Ansible playbook.
Prerequisites
Before executing the Ansible playbook, ensure the following prerequisites are met:
- The Site24x7 Linux monitoring agent must be installed and actively running on all target hosts.
- Ansible should be correctly installed and configured on the controller node.
- All target hosts must be accessible via SSH from the controller node.
- Ensure the plugin that you want to install (the plugin folder along with the files) is available on the controller node.
- Ensure that you meet all the prerequisites of the plugin you want is install.
Execution steps
- Download the Ansible Playbook from our GitHub repository.
You can use the following command to download the playbook:wget https://raw.githubusercontent.com/site24x7/plugins/refs/heads/master/pluginbulkinstallation/linux/ansible/ansiblepluginbulkinstallation.yaml
- Define the target hosts.
Open the playbook file and ensure the hosts group matches the intended target group. By default, it is set to all.

- Run the following command to execute the playbook, and specify the plugin folder path (e.g., /root/user/plugin_name) where the plugin files are located:
Then, follow the instructions in the terminal to complete the installation of the plugin.ansible-playbook ansiblepluginbulkinstallation.yaml -e "plugin_folder_path=/root/user/plugin_name"
Related articles
-
On this page
- Via the Site24x7 web client
- Via Ansible
- Related articles
