Plugin bulk installation for Windows
If you want to install a plugin on multiple Windows servers at once, you can do so via one of the following methods:
- The Site24x7 web client with the Server Monitoring agent
- Plugin Bulk Installation Wizard using Active Directory
1. Via the Site24x7 web client with the Server Monitoring agent
You can use this method to bulk-install plugins using the Site24x7 web client, which leverages the Server Monitoring agent, and adds the plugins to the servers on your account.
Prerequisites
- The Site24x7 Windows monitoring agent should be installed on the servers you are planning to install the plugins on.
- Ensure that the IT automation module is enabled for the Windows monitoring agent.
- Ensure that you meet all the prerequisites of the plugin you want is install.
Steps to bulk-install
- Download the required plugin files from our GitHub repository for the plugin you want to install and place them in a new folder with the same name as the plugin files. Then, zip the folder.
For example, if you download ScheduledTask.py and the ScheduledTask.cfg from the GitHub repository, configure the ScheduledTask.cfg file, and place the files in a folder named ScheduledTask. Then, zip the ScheduledTask folder.
You will need this zip file to install the plugin in Step 4. - On the Site24x7 web client, navigate to Plugins > Plugin Bulk Installation.
- In the resulting fields, provide a name for the bulk installation, choose the OS type, and select all the hosts you want to install the plugin on.
- Upload the plugin zip file you created in Step 1.
- Read and check the disclaimer and click Install. The uploaded plugin will be installed on the selected hosts. If a plugin with the same name already exists on any of the selected hosts, it will be replaced by the new plugin.
To check the installation status, click the Installation History tab.
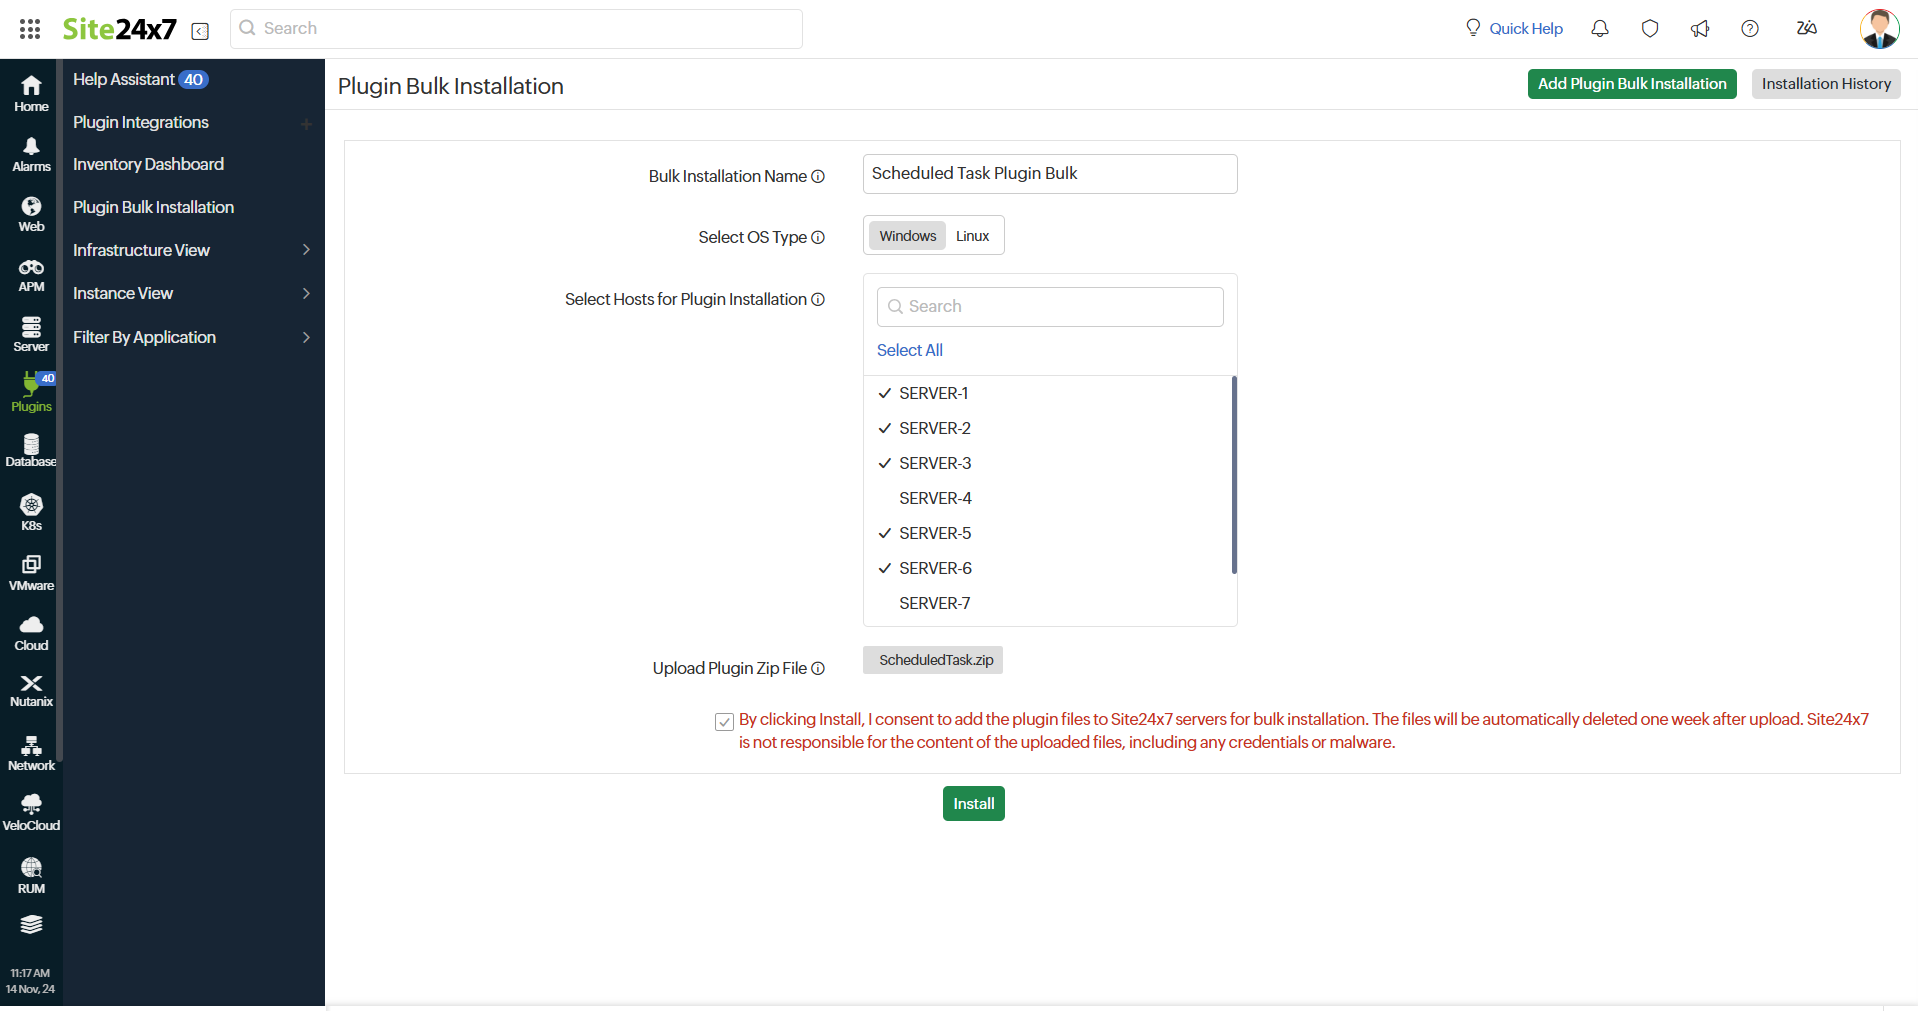
Site24x7 is not responsible for the content of the uploaded files, including any credentials or malware. The uploaded plugin zip file will be unzipped and executed on the selected hosts' Server Monitoring agent plugin folder. The uploaded files for installation will be automatically deleted one week after upload.
2. Via the Plugin Bulk Installation Wizard using Active Directory
If you want to install a plugin on multiple servers at once, you can use the Plugin Bulk Installation wizard. The wizard uses Active Directory administrative credentials to streamline the installation process across all selected servers.
Prerequisites
- The Site24x7 Windows monitoring agent should be installed on the servers you are planning to install the plugins on.
- Active Directory should be configured properly so that all the required servers are reachable.
- Network share should be enabled for the required servers where the Site24x7 agent is installed.
For example, if the agent is installed in C: drive in server SERVER1, ensure that the following path is enabled: \\SERVER1\C$
NoteThe path is enabled by default. If you've disabled it, please re-enable it.
- Ensure file copying permission from the host to the remote machine is granted.
Steps to bulk-install
- Download the required plugin files from our GitHub repository for the plugin you want to install and place them in a new folder with the same name as the plugin files. Then, zip the folder.
For example, if you download ScheduledTask.ps1 and the ScheduledTask.cfg from the GitHub repository, configure the tasks in the ScheduledTask.cfg file, and place the files in a folder named ScheduledTask. Then, zip the ScheduledTask folder.
You will need this zip file to install the plugin in Step 4. - Download the Site24x7PluginWindowsBulkInstall zip file.
- Unzip the downloaded file, then open the Site24x7BulkInstallForm file and Run as Administrator.
- Browse and select the plugin zip file you had created in Step 1. Click Yes.
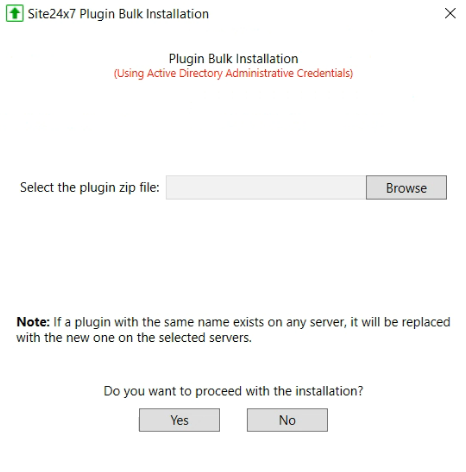
- Select the servers where you want to install the agent by checking the checkboxes next to each server's name. You can choose multiple servers. Click Next.
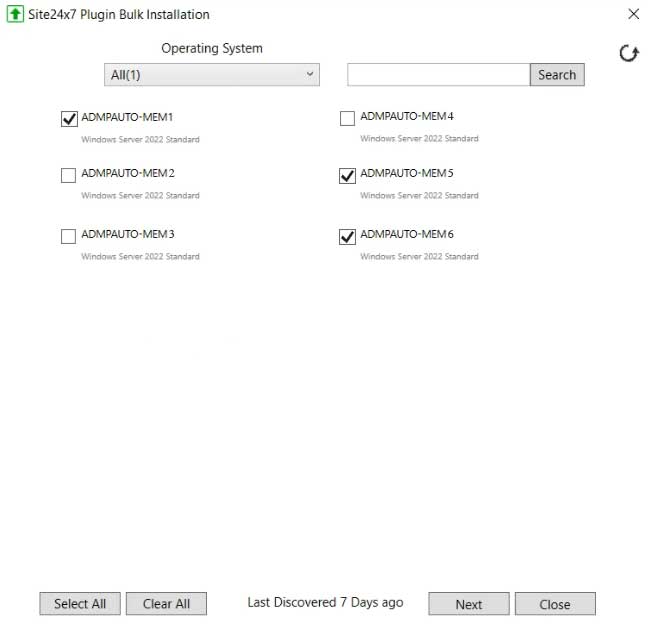
- Enter the Active Directory username (AD user name) and password. You need Admin privilege to perform this action.
- Provide the path of the directory where the Site24x7 Windows monitoring agent is installed on the remote servers. Click Next.
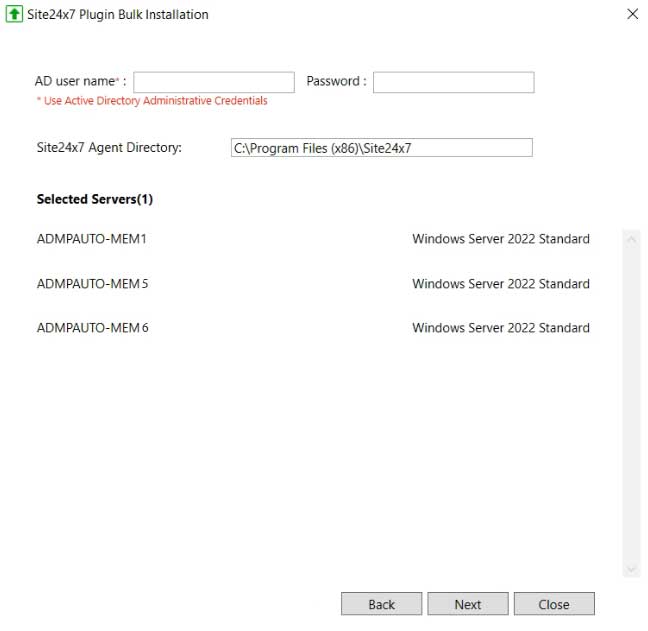
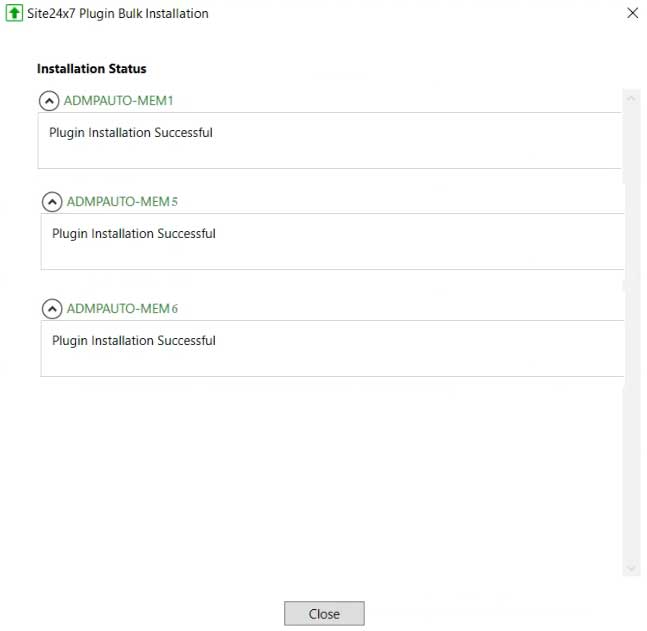
The plugin will be installed on the selected servers, and you can see the installation status in the following screen.
Related articles
