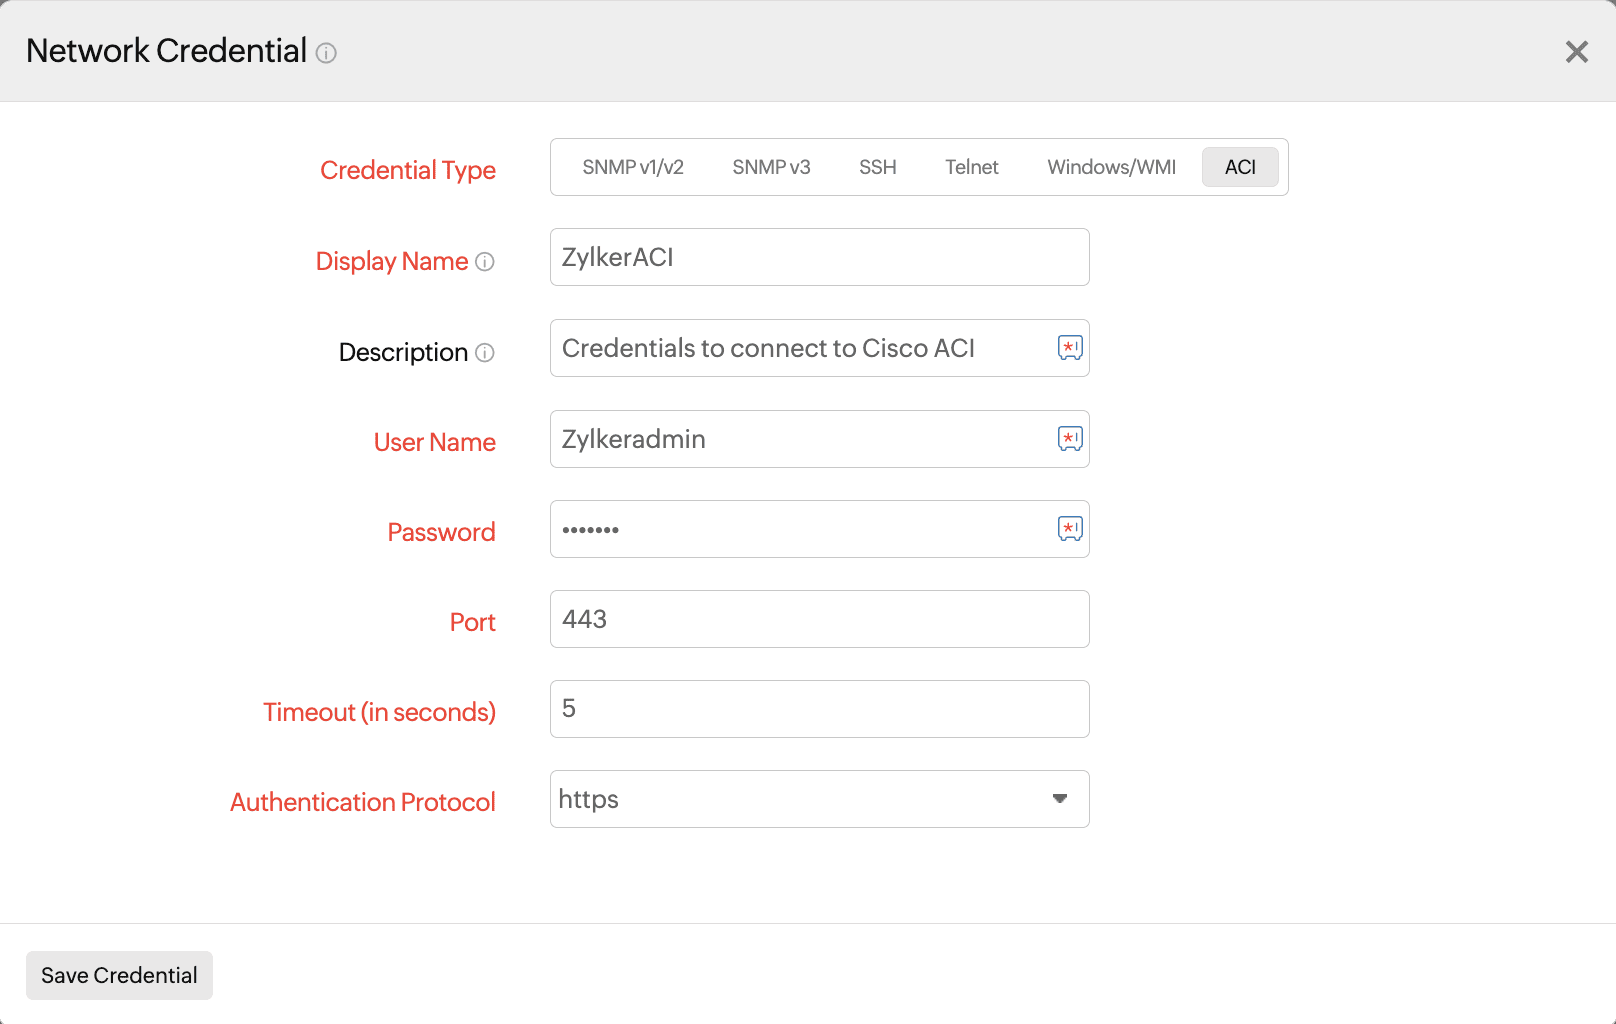
Cisco Application Centric Infrastructure credentials
Once you enable HTTP or HTTPS access to the Cisco Application Centric Infrastructure (ACI) network, you can authorize Site24x7 to connect and retrieve health data. To do so, you can securely save your credentials on Site24x7 and apply them to multiple devices at a time, saving manual effort.
Creating a new Cisco ACI credential
- Log in to your Site24x7 account.
- Navigate to Network > Network Credentials.
- Then, click Add Credential in the top-right corner of the screen.
- Select ACI in the Credential Type field.

- Enter the values in the fields as given below
- Display Name: Provide a unique name to identify the credentials. This name should not contain any spaces or special characters.
- Description: Provide a relevant description about the credential for your understanding.
- User Name: Provide the user name that will be used for connecting to the Cisco ACI fabric.
- Password: Provide the correct password to connect to the Cisco ACI fabric. The data will be encrypted and stored securely in Site24x7.
- Port: The port that will be used for making the secure connection. By default, 443 is provided. Check the necessary ports and domains to allow access to the installed On-Premise Poller in your network.
- Timeout (in seconds): Specify the maximum time Site24x7 will wait for a response from the Cisco ACI fabric.
- Authentication Protocol: Select HTTP or HTTPS from the drop-down menu. Site24x7 recommends using HTTPS for increased security.
- Click Save Credential.
Editing or deleting a Cisco ACI credential
- Navigate to Network > Network Credentials.
- To edit a credential:
- Click the pencil
 icon in the Action column for the credential that you would like to edit.
 - Make the necessary changes and click Save Credential.
- Click the pencil
- To delete a credential, click the trash
 icon in the Action column. In the confirmation pop-up, click Delete.
