Integrate your OCI resources with Site24x7
In order to monitor your Oracle Cloud Infrastructure (OCI) resources using Site24x7, you need to set up cross-tenancy access. This process involves creating a policy in OCI that grants Site24x7 the necessary permissions to access and monitor your resources.
After you've created the policy, the next step is to copy the Compartment ID (OCID) from the Compartment details page in the OCI cloud console and paste it into the Site24x7's Cloud > OCI > Integrate OCI Monitor page. This will link your OCI compartments to Site24x7, allowing for comprehensive monitoring of your OCI resources.
Prerequisites
- Ensure that you've created the policy granting necessary permissions to Site24x7.
- Paste the Compartment ID from the Compartment details page in the OCI cloud console.
Add an OCI resource monitor
Follow the steps below to successfully add your OCI resource monitors to Site24x7:
- Log in to your Site24x7 account.
- Navigate to Cloud > OCI > Integrate OCI Monitor. Alternatively, you can also click Admin in the left navigation pane and under Cloud Monitoring click OCI.
- Enter the Display Name.
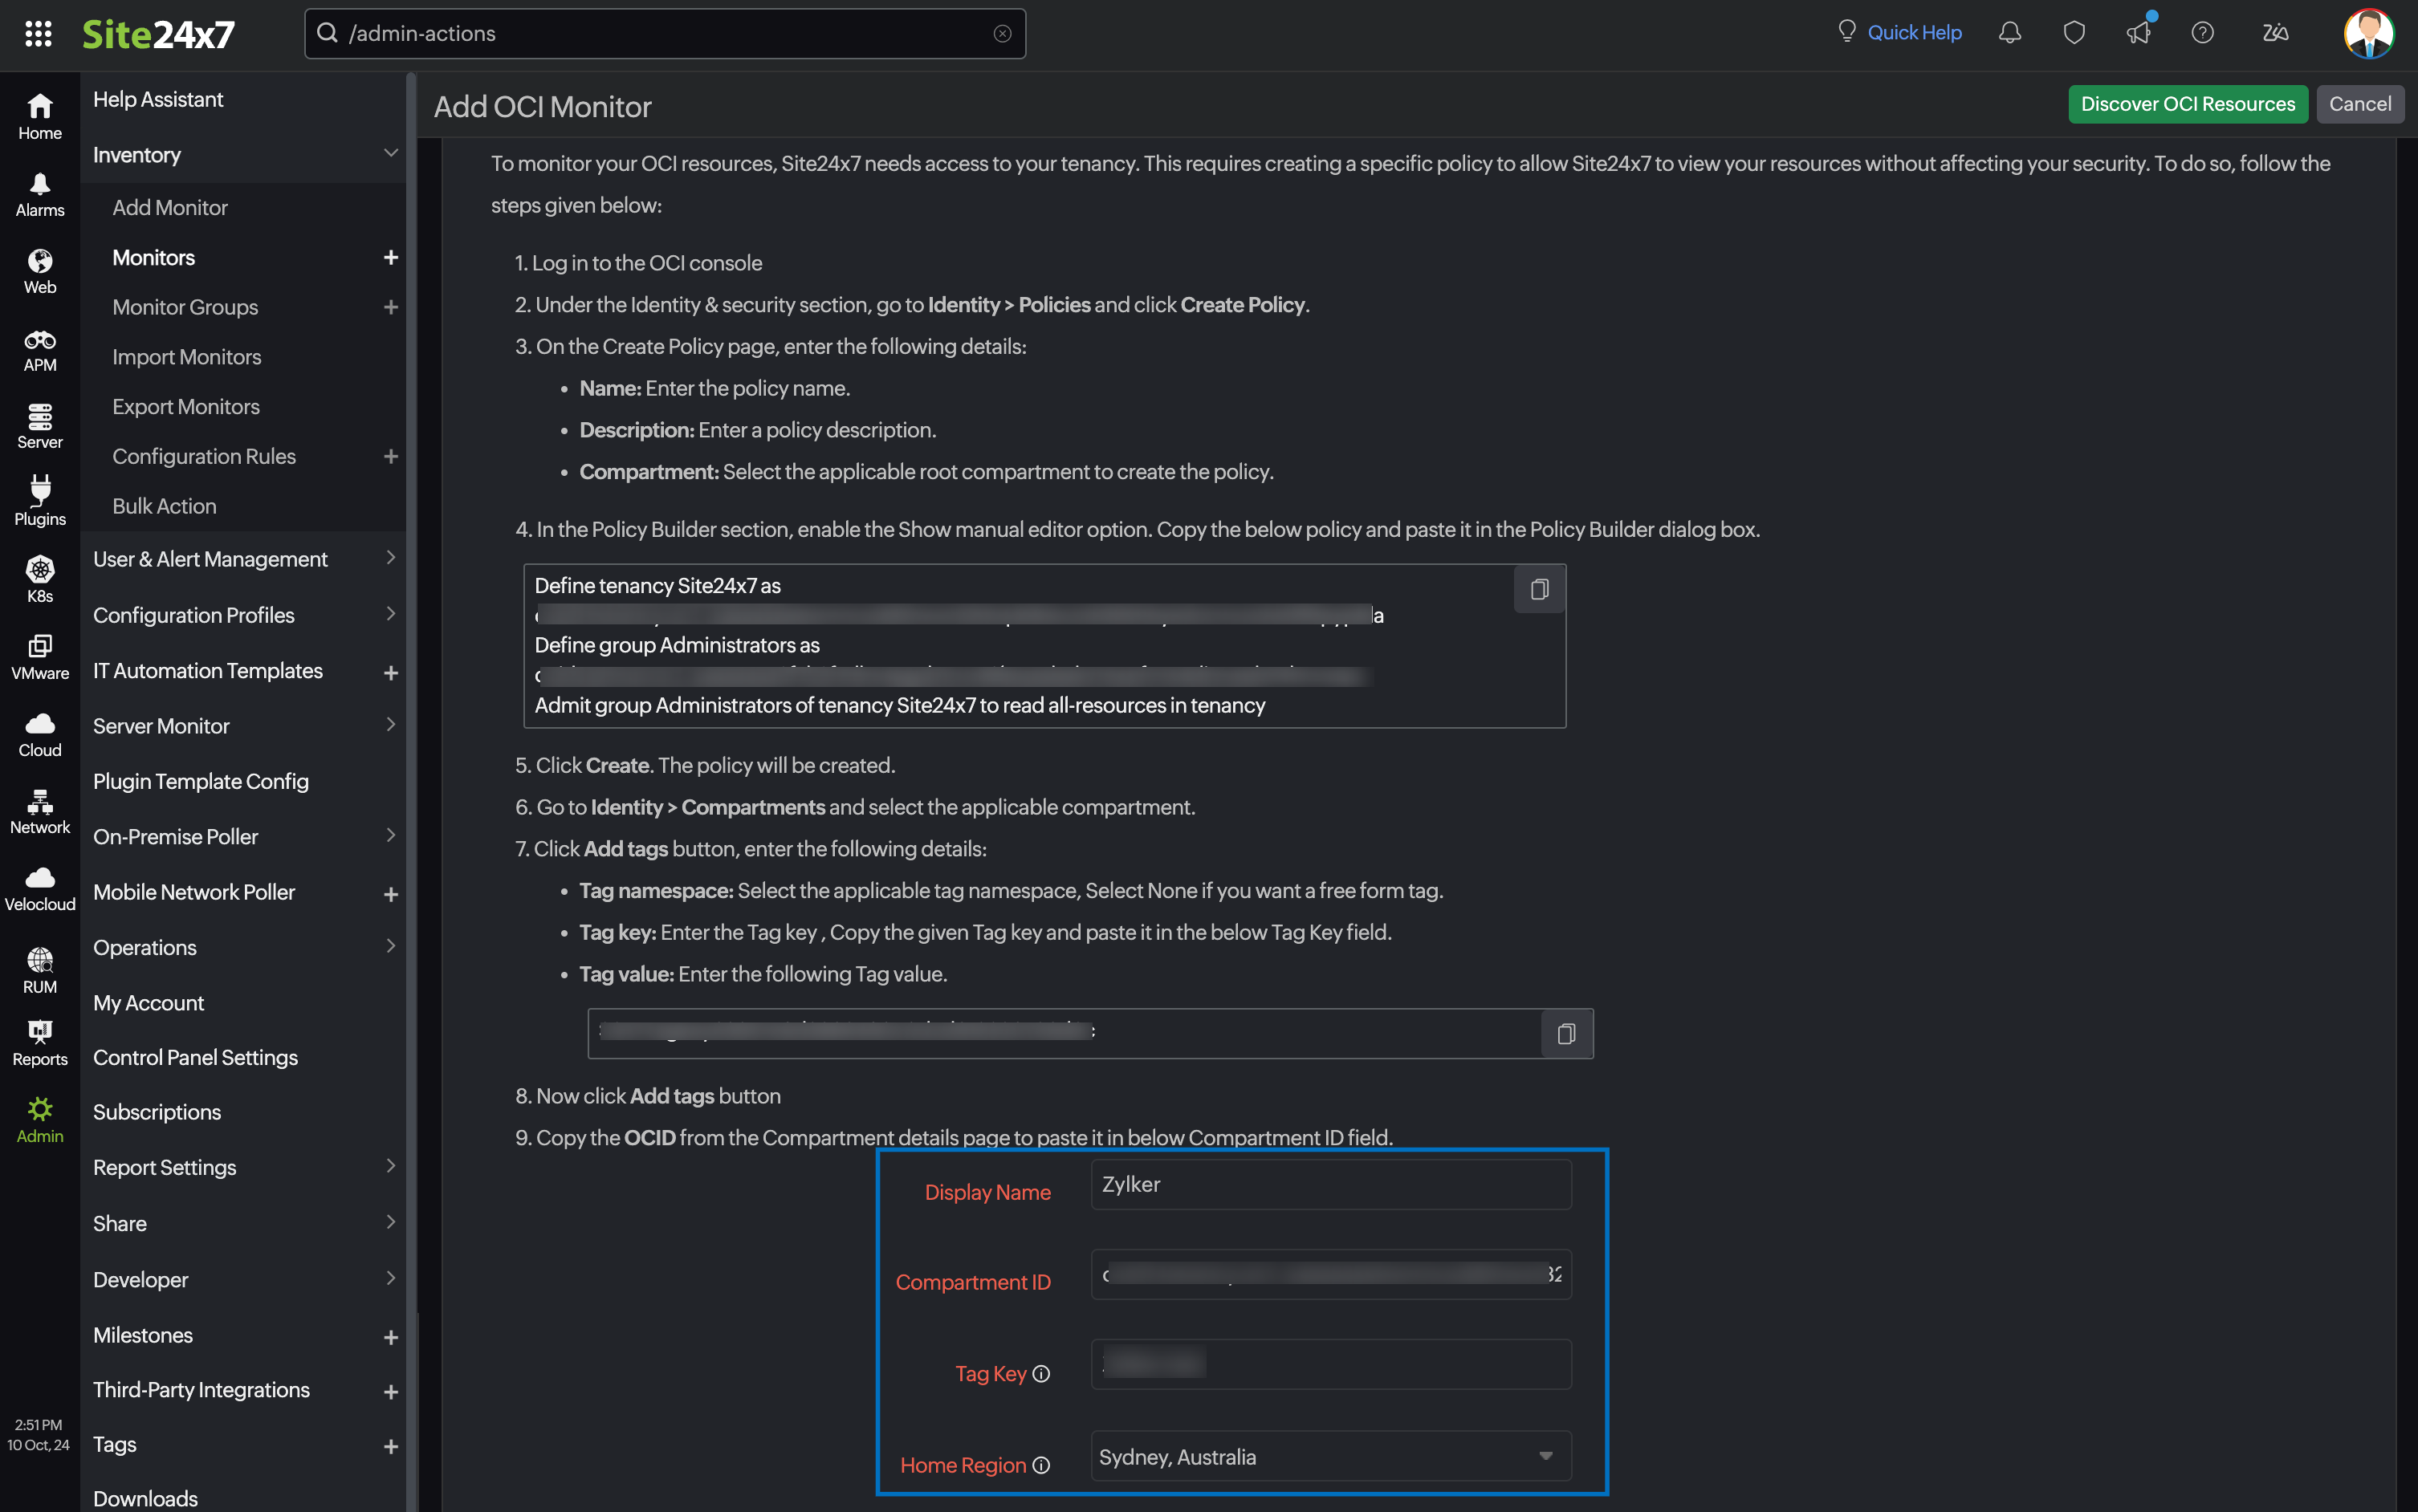
- Paste the Compartment ID from the Compartment details page in the OCI cloud console.
- Enter the Tag Key of the tag created in your compartment. The tag key will be in the format: [tag-namespace].[tag-key]. You can select defined tags or free form tags as applicable.
- Select the Home Region where your IAM resources are defined.
Once you've completed the above steps, configure your requirements for each of the below sections.
Discovery options
- Services to be discovered: Select the applicable OCI resources to be discovered for integration.
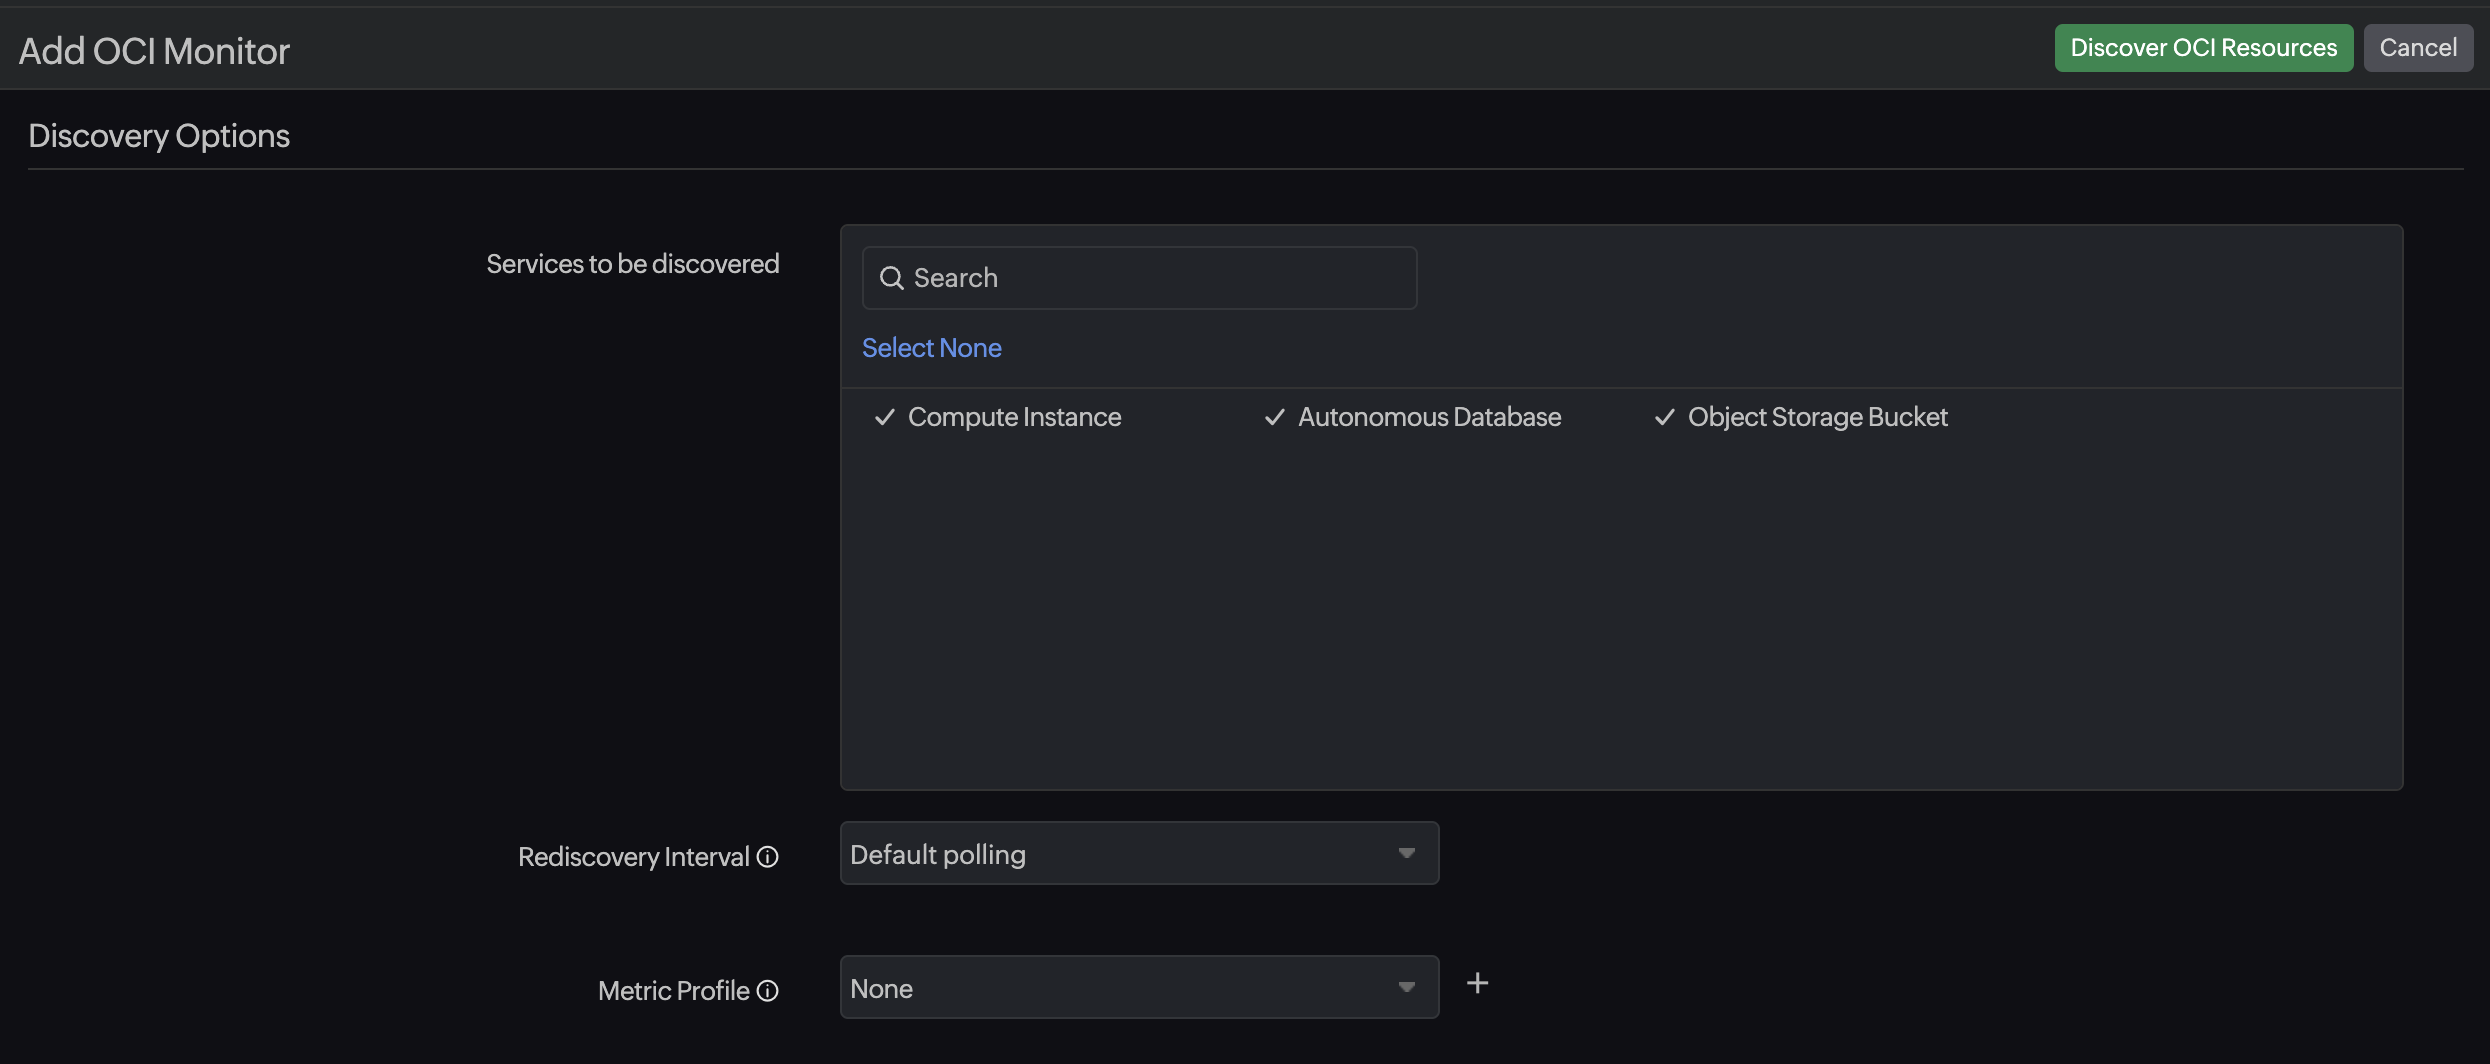
- Rediscovery Interval: Select the required rediscovery interval for your resources. The Rediscovery Interval checks your OCI account for any new changes made, and enable you to configure how frequently you want Site24x7 to query your OCI resources.
Site24x7's OCI monitoring currently supports, three modes of rediscovery intervals.- Default polling: Regions with OCI resources will be polled every five minutes, and for other supported regions polling interval will be one hour.
- Fewer polling: Regions with OCI resources will be polled every five minutes, and for other supported regions polling interval will be six hours.
- Never: No rediscovery will be made for any OCI resource at any region. The user will have to use the Poll Now option to initiate rediscovery. You can either initiate an OCI compartment level poll (navigate to the Inventory Dashboardof the monitored OCI compartment > Poll Now) or initiate an individual OCI resource level poll (navigate to the resource Summary page > Poll Now).
- Metric Profile: Choose to monitor specific OCI metrics with Metric Profile.
Exclude/Include OCI Resources
Site24x7 automatically discovers OCI resources based on your policy settings. Use our tag-based filtering feature to fine-tune this discovery. Select specific resources for monitoring by applying include and exclude tags. These tags can be combined using AND/OR logic for precise control.
You can use System Tags (Region, Virtual Cloud Network (VCN) ID), User Defined Tags defined at OCI console (key-value pairs), and Site24x7 Custom Tag to filter which OCI resources get included during OCI monitoring.
System Tags
System Tags are predefined resource attributes like Region and VCN ID to filter resources. You can use these attributes to filter resources from being discovered.
User Defined Tags
User Defined Tags are the tags you have configured to group various resources based on the owner, purpose, environment, or any other criteria. They can be used in the Site24x7 console to filter resources from being discovered.
Site24x7 Custom Tag
You can also assign your resources with the custom tag key, monitor_site24x7 and set its value as false in the OCI console. The resources that have this tag and value will be ignored during auto discovery. You can revert this behavior by removing the tag from the resource.
When the custom tag (monitor_site24x7) has its value set as false in the OCI console, this tag will be given priority over all other user-defined tags created. In such cases, even when an Include and Exclude tag can be added to an OCI resource, the Include/Exclude/AND/OR logic cannot be supported.
An important point to note is that the tag must be configured beforehand. To do this, log into your OCI console, navigate to the resource dashboard of the service you want to tag, select the resource and add the tag. Once you are done, you can navigate back to the OCI console and configure the custom tag key and value in the field provided.
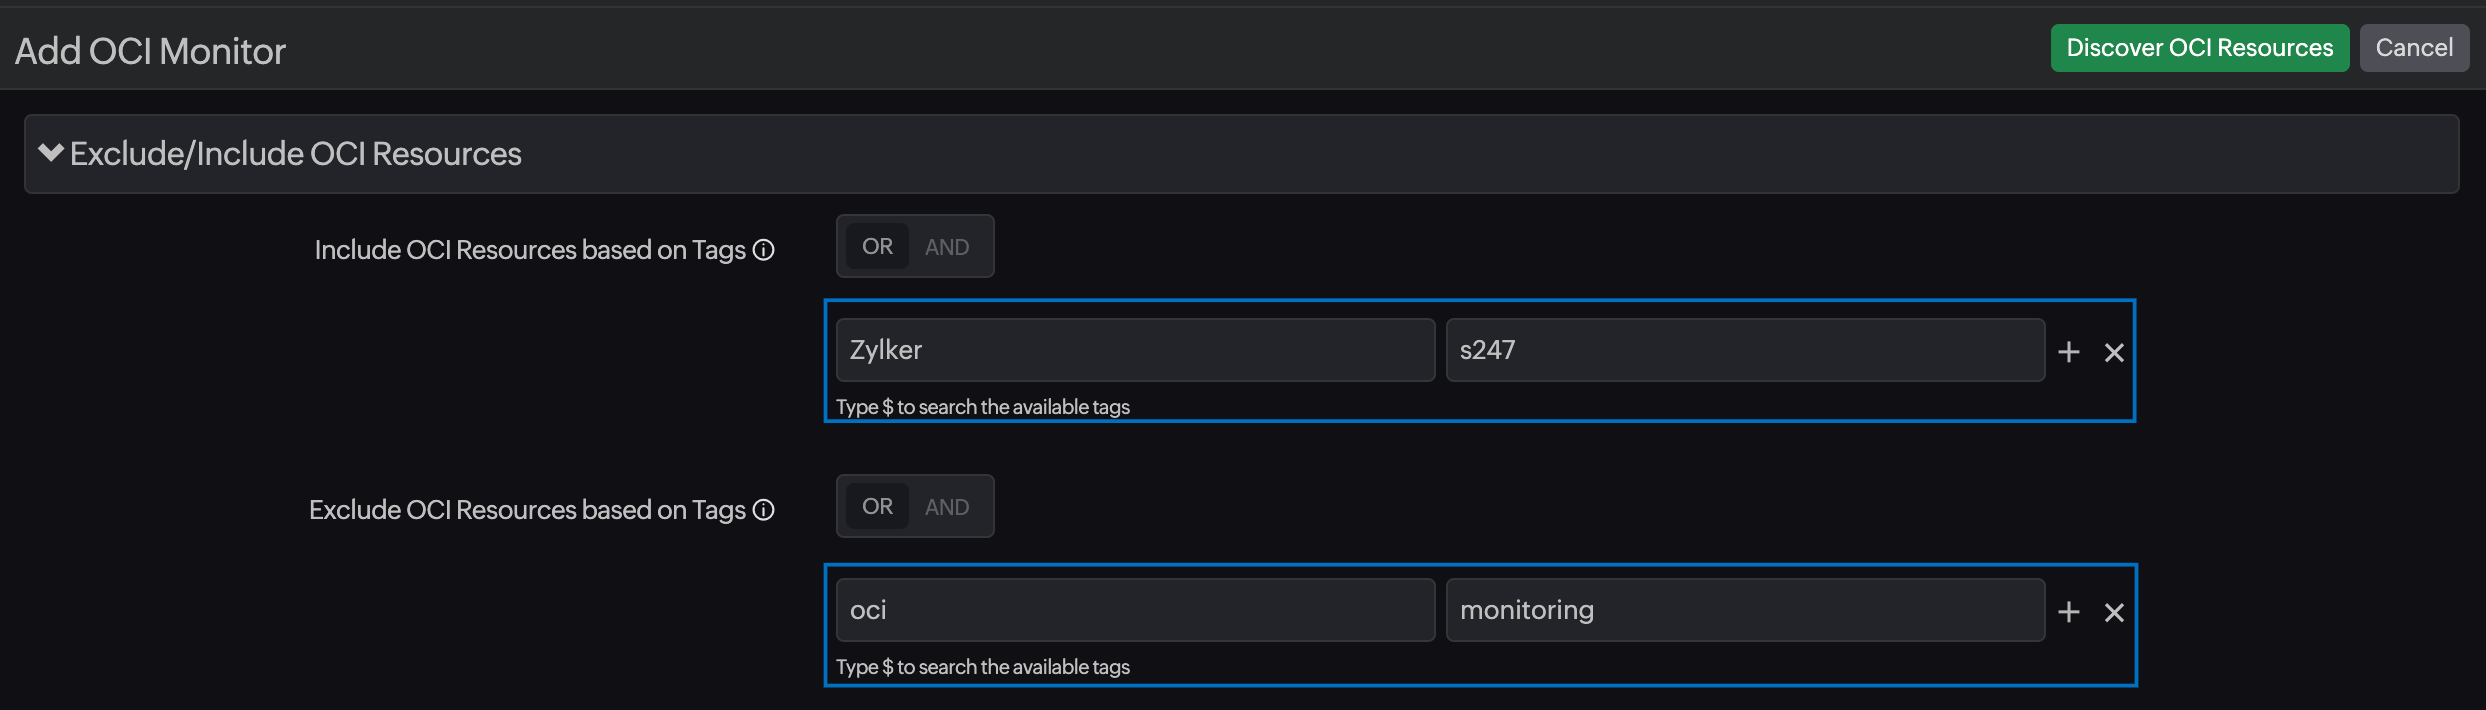
Include OCI Resources based on Tags: Enter the key and also the values to match the resources that you want to include for monitoring. Toggle between OR or AND based on your preference. You can add as many tags as you need by clicking the + icon near the Value tab.
This option will include the matching resources from your OCI compartments and add them for monitoring.
Exclude OCI Resources based on Tags: Enter the key and also the values to match the resources that you want to exclude from monitoring. Toggle between OR or AND based on your preference. You can add as many as you need by clicking the + icon near the Value tab. This option will exclude the matching resources from your OCI compartments and exclude them from monitoring.
- You can configure any number of tags in the Site24x7 console at a given time.
- Both filtering options, Include and Exclude, can be used simultaneously for various tags except for the Region tag.
AND/OR logic can be performed only when you enter more than one tag in the Include or Exclude. - System attributes - Region and VCN ID, and user-defined tags are applicable for both include and exclude filtering options.
- All the basic restrictions that apply for user-defined tags in the OCI console, like key length, character length, and case-sensitive nature, are applicable in Site24x7 as well.
Tag exceptions
The above mentioned Include/Exclude/AND/OR tags may not be applicable for each OCI resource available. Here are some exceptions:
- No tag support: A few OCI services may not support tags in general. Such resources are discovered automatically, regardless of any specific filter tag added.
- Global region support, No VCN ID: When you type $ in the Key field to search for default tags, REGION and VCN ID are the default suggestions. Default tags can't be used when an OCI resource has global region support extended and no VCN ID associated to it. In such cases, only the key-value mentioned in the Include/Exclude option will be considered.
- Whatever tag is given in Site24x7, the tags will not be considered if it isn't applicable for an OCI resource.
- The OCI resources that are currently being monitored, can't be excluded by configuring tags. For Site24x7 to exclude/include resources, the tags must be configured before initiating Auto Discovery or the tagged resource must be a new instance that has not been discovered yet.
For example, consider a scenario where you want to exclude a group of five instances which were launched in a specific VCN. However, these resources have already been discovered and are being monitored. Configuring an exclude tag now with the key $VCN and value VCN ID won't help you filter these resources. These resources can only be excluded by suspending the said monitors from the Site24x console.
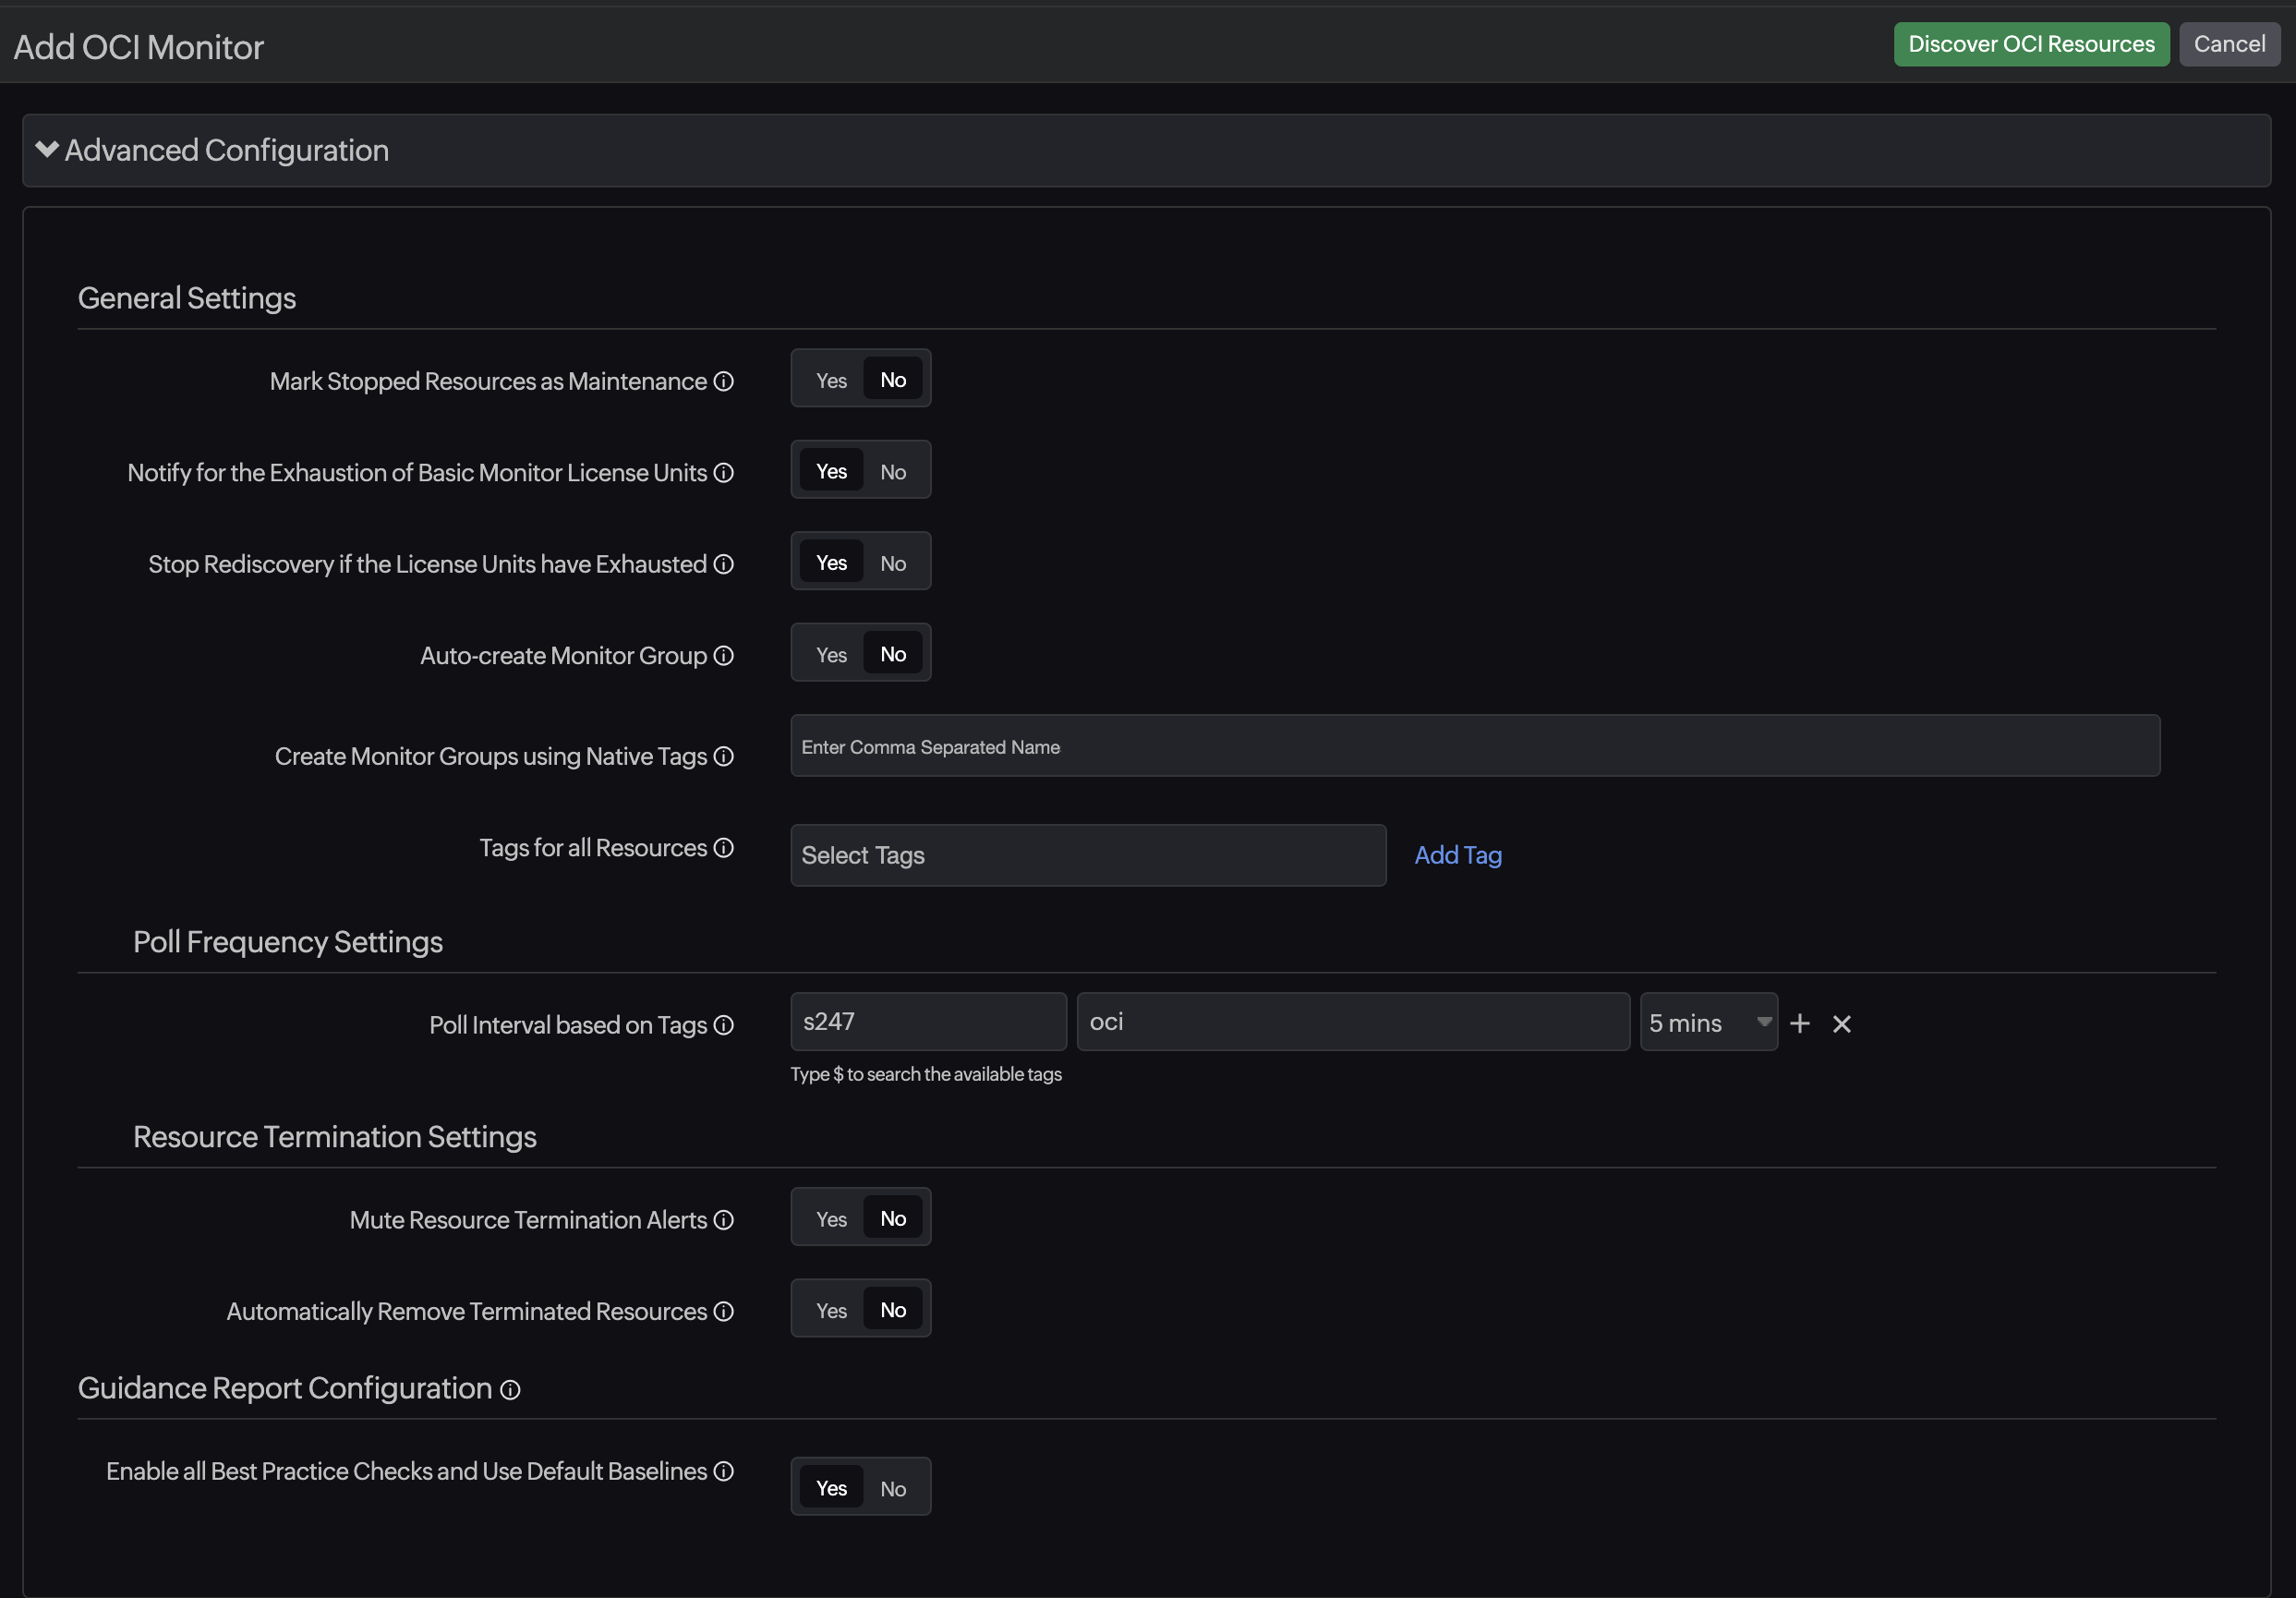
Advanced Configuration
Configure general settings, poll frequency settings, and resource termination settings from the Advanced Configuration section.
Configuration Profiles
Tags: Select the tags you would like to associate with the monitor you are creating. Click the Add Tag to create a new tag.
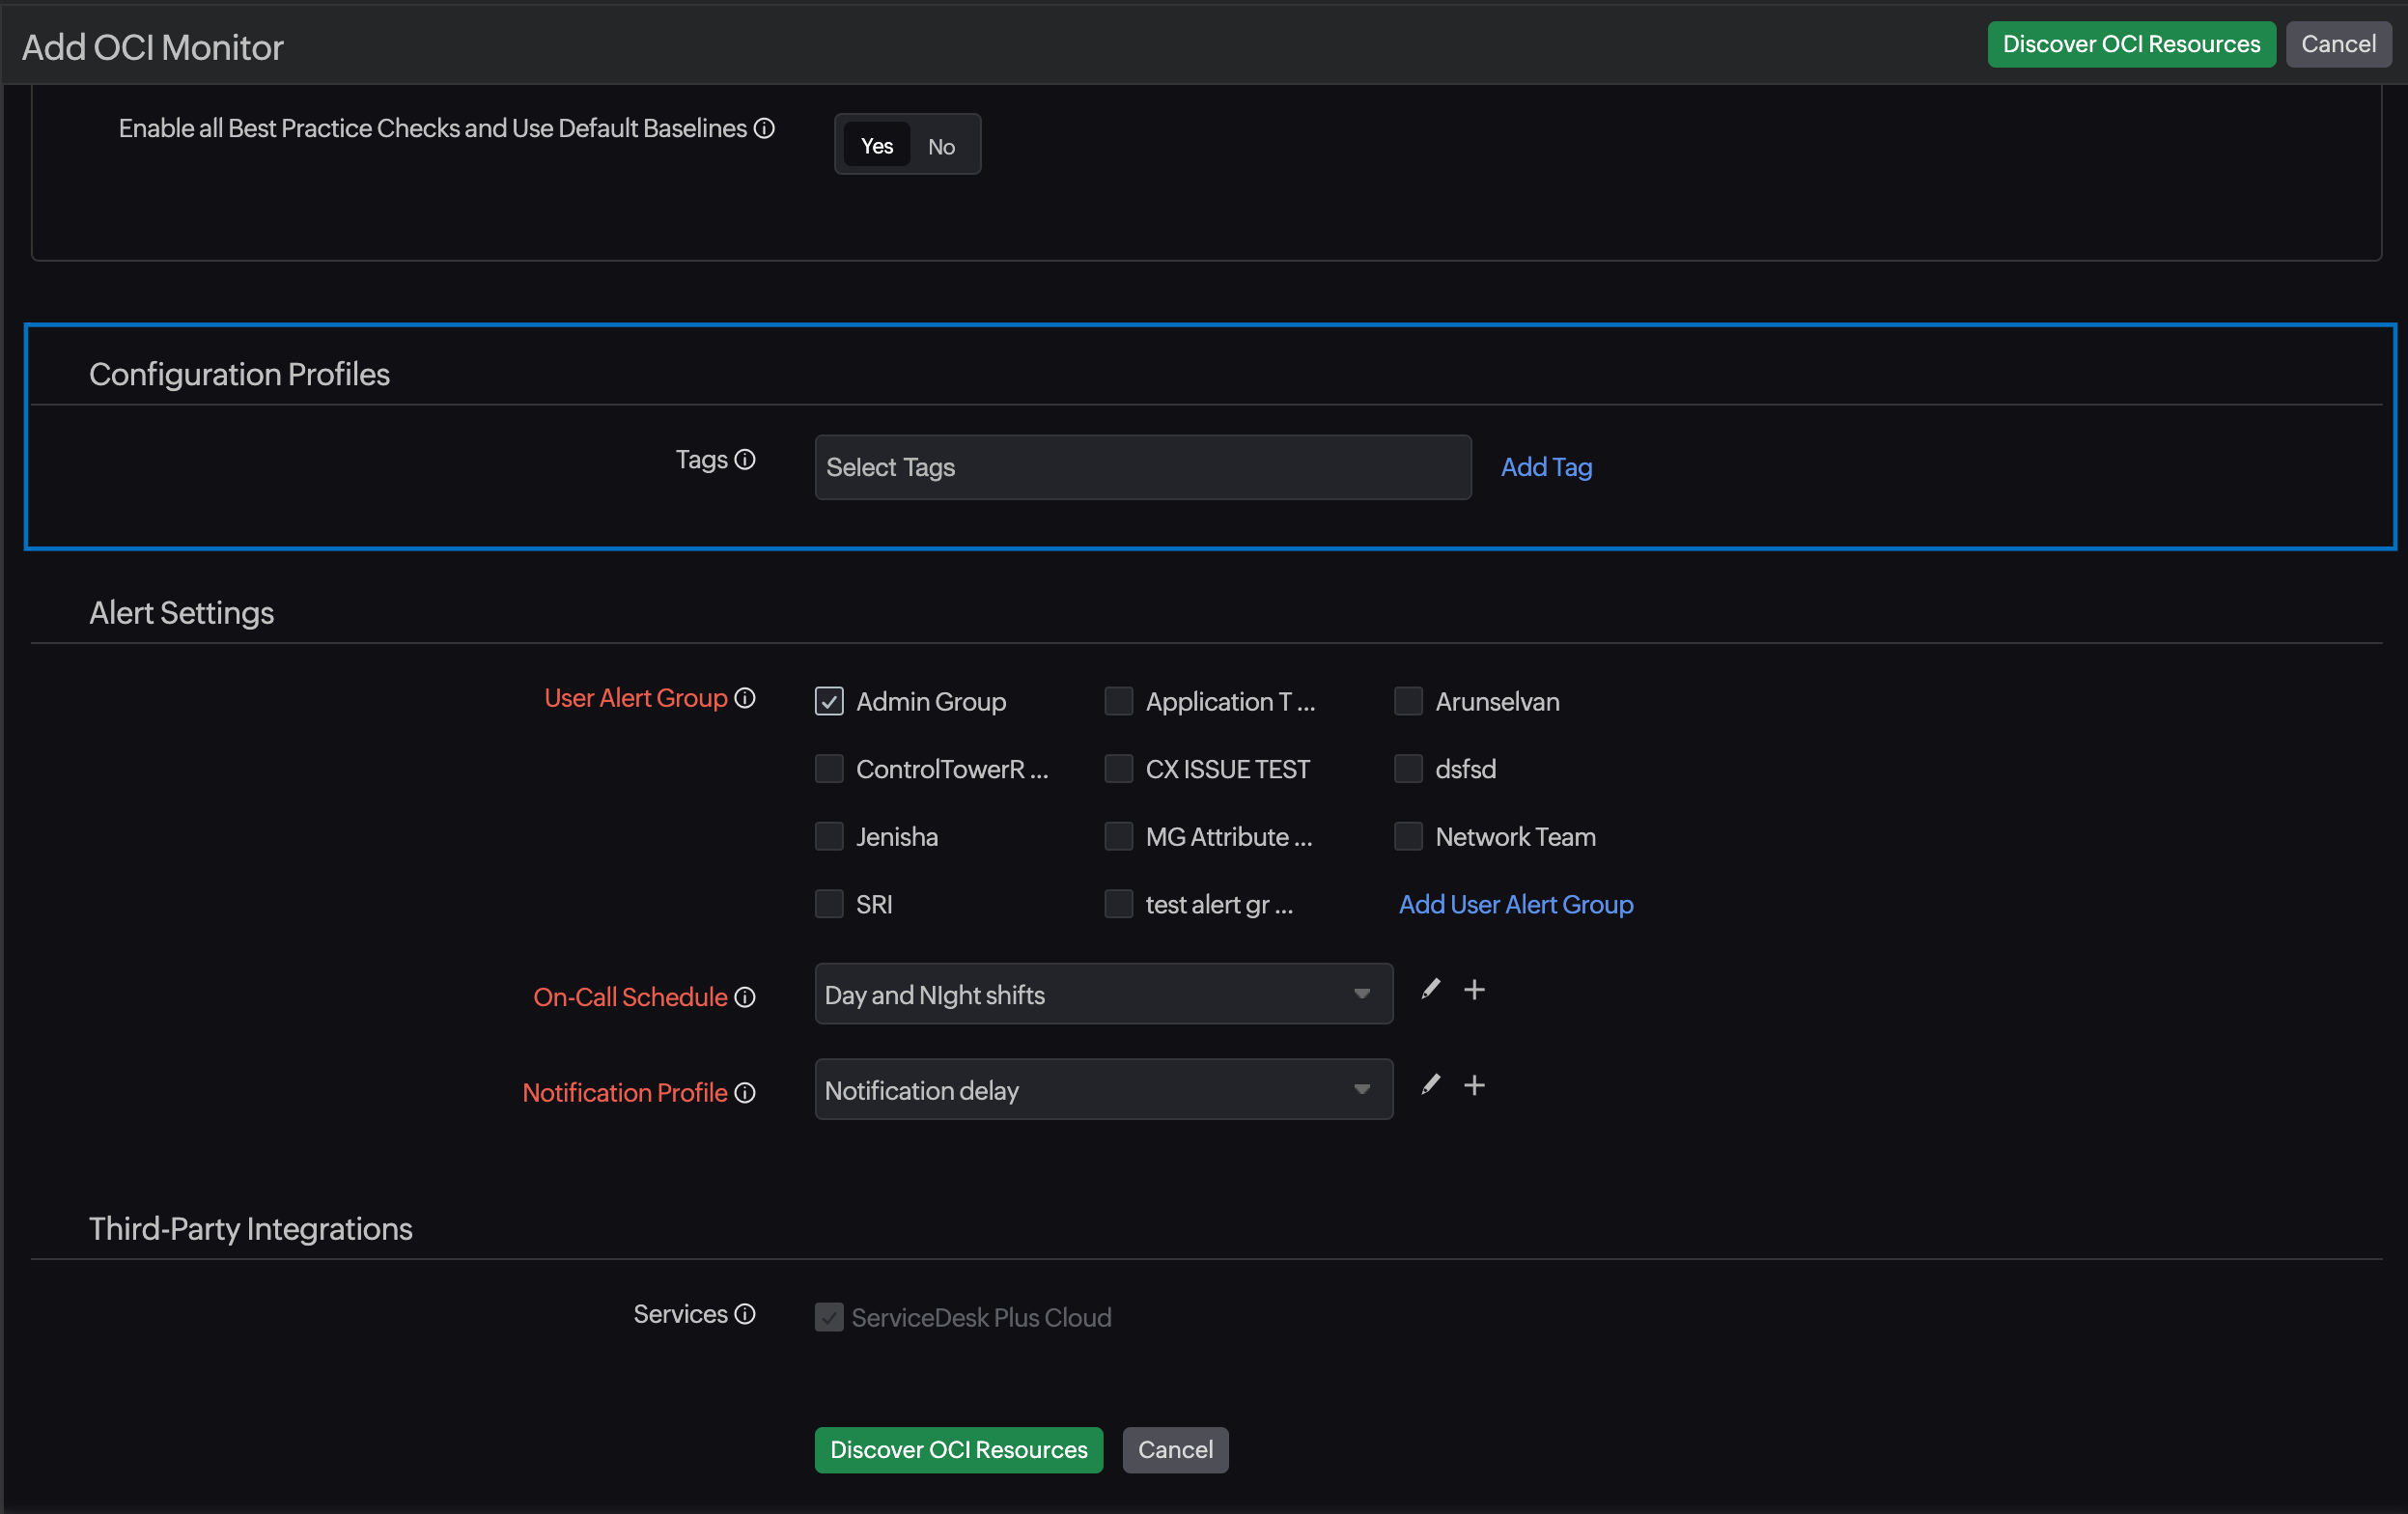
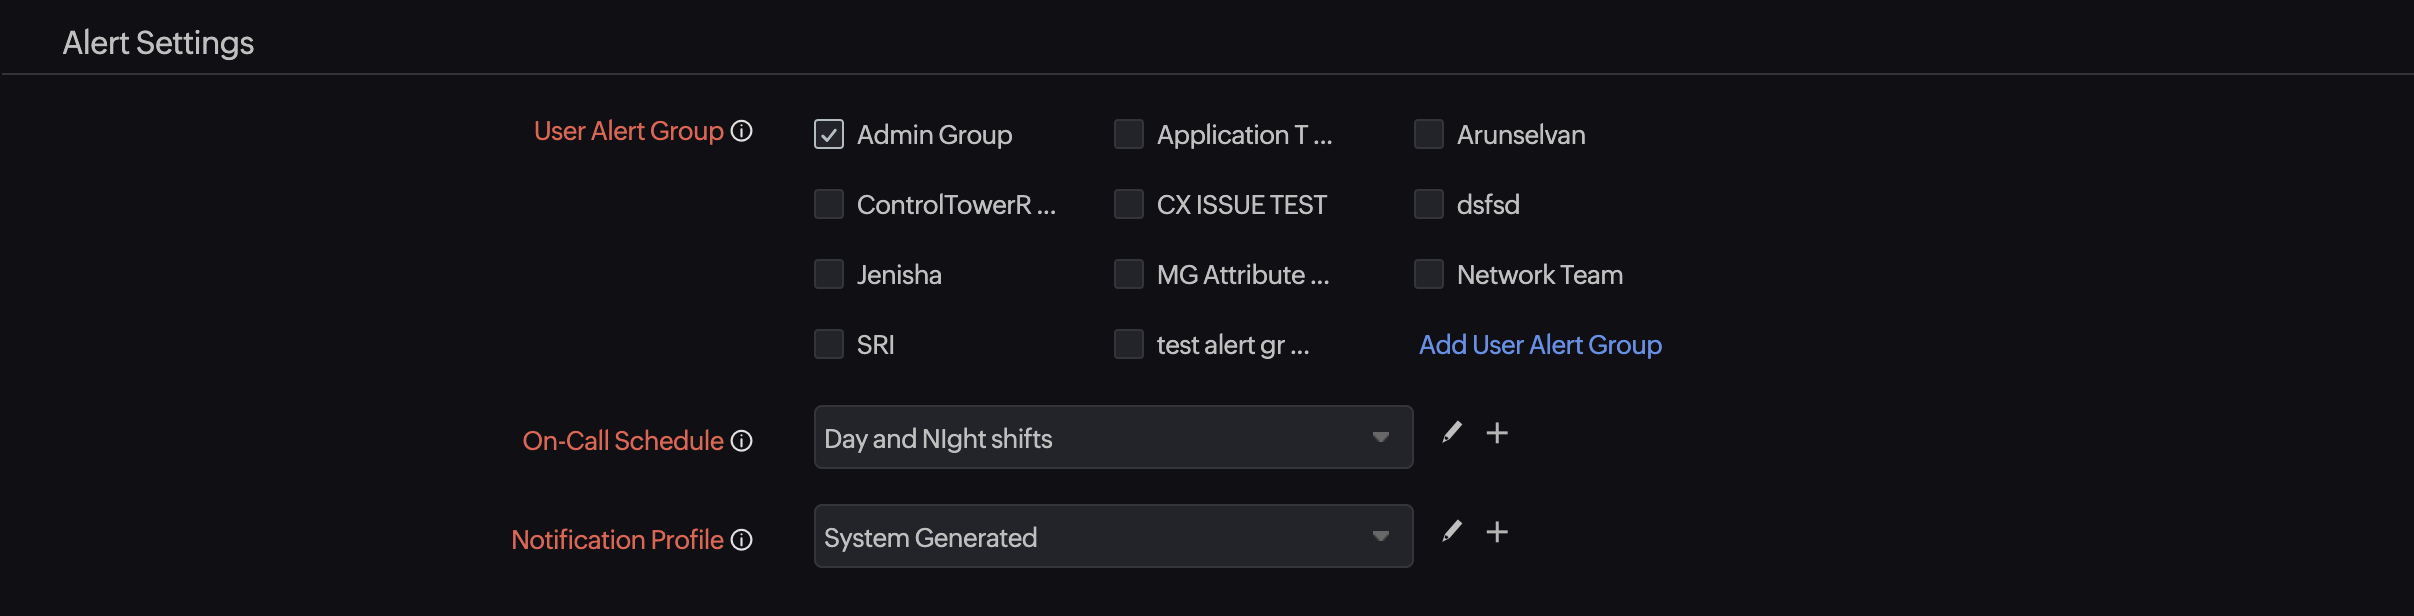
Alert Settings
- User Alert Group: Select the User Alert Group to which you would like to send notifications related to the monitor you are creating. Click Add User Alert Group to add a user alert group.
- On-Call Schedule: Select an On-Call Schedule so that the alerts reach the appropriate person at the appropriate time. Use the + icon to create a new On-Call Schedule.
- Notification Profile: Select the required Notification Profile to set how notifications should be sent. Use the + icon to create a new Notification Profile.
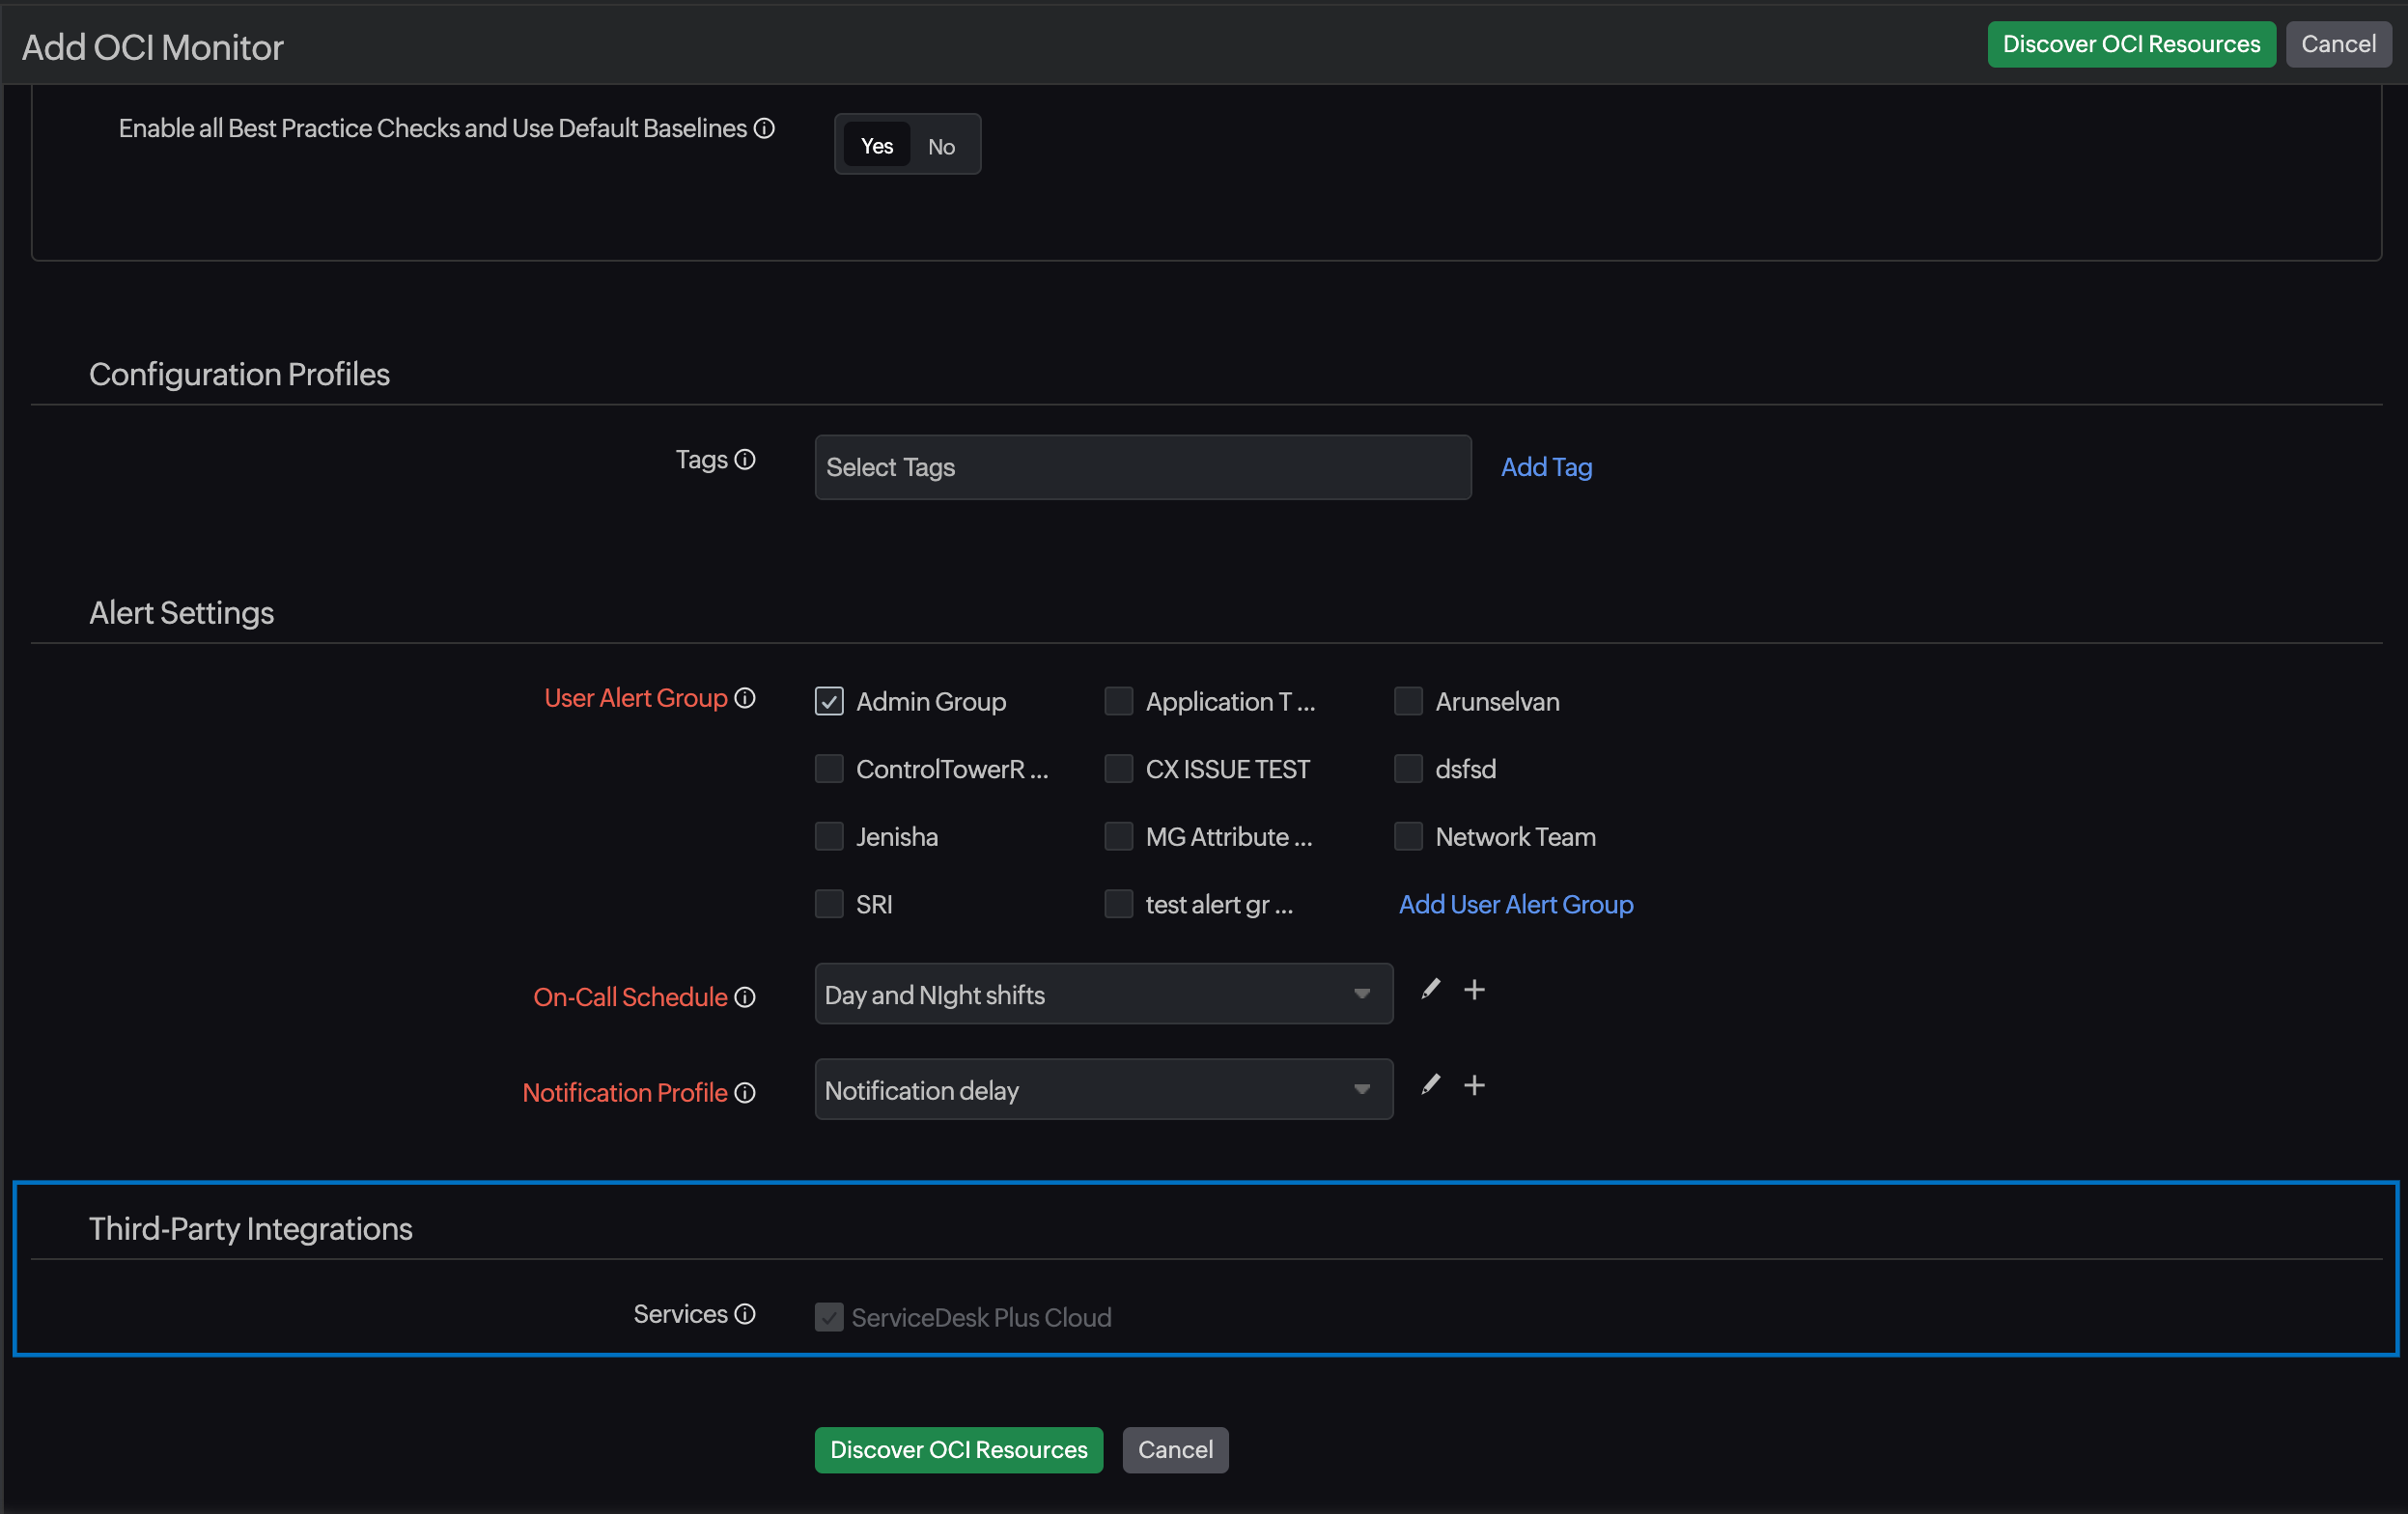
Third-Party Integrations
You can associate your monitor with a third party alert or ticketing service. It enables you to push alert notifications to the selected service and facilitate improved incident management.
To setup third party integrations, navigate to Admin > Third Party Integration in the Site24x7 console.
Discovering OCI Resources
After you configure the above sections, click Discover OCI Resources. The monitor you created will be added to Site24x7.
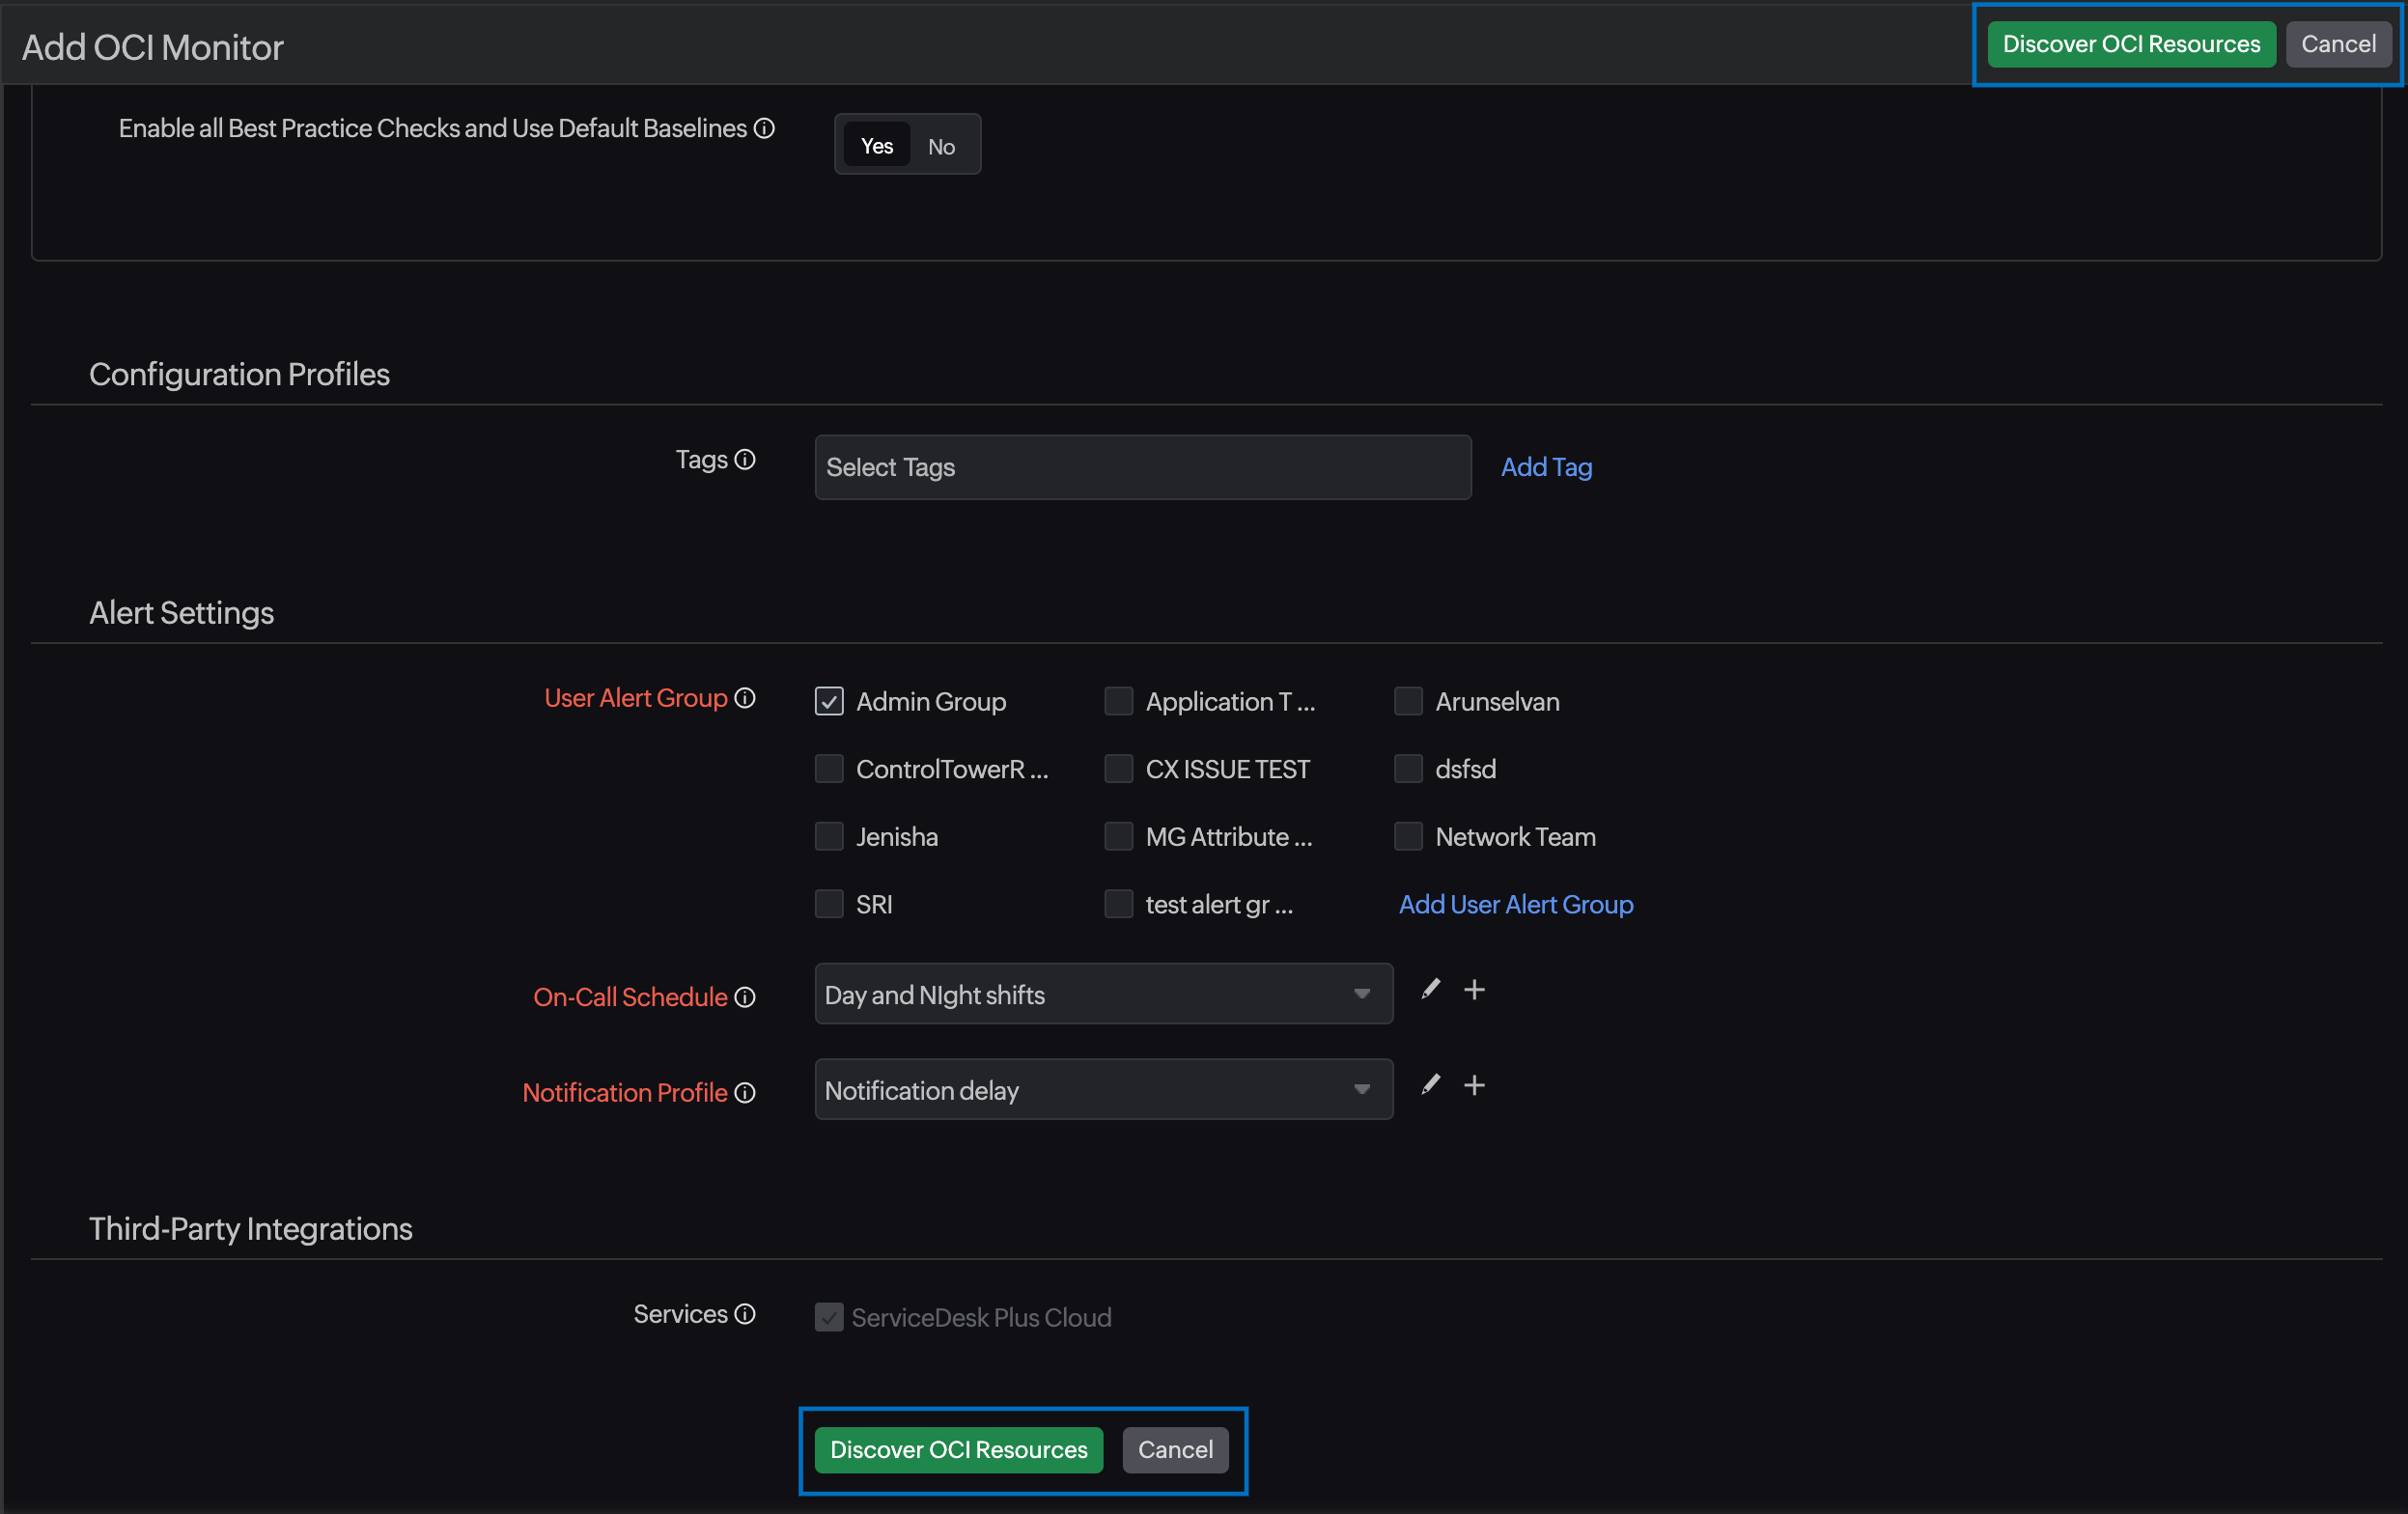
Site24x7's automated discovery process efficiently identifies all supported OCI services within your tenancy. Upon successful integration, the newly added OCI monitor becomes active, and associated OCI resources are listed in the resource discovery page.
The left navigation panel will automatically highlight the OCI monitor, providing quick access to infrastructure and inventory dashboards for the selected tenancy.
What next?